
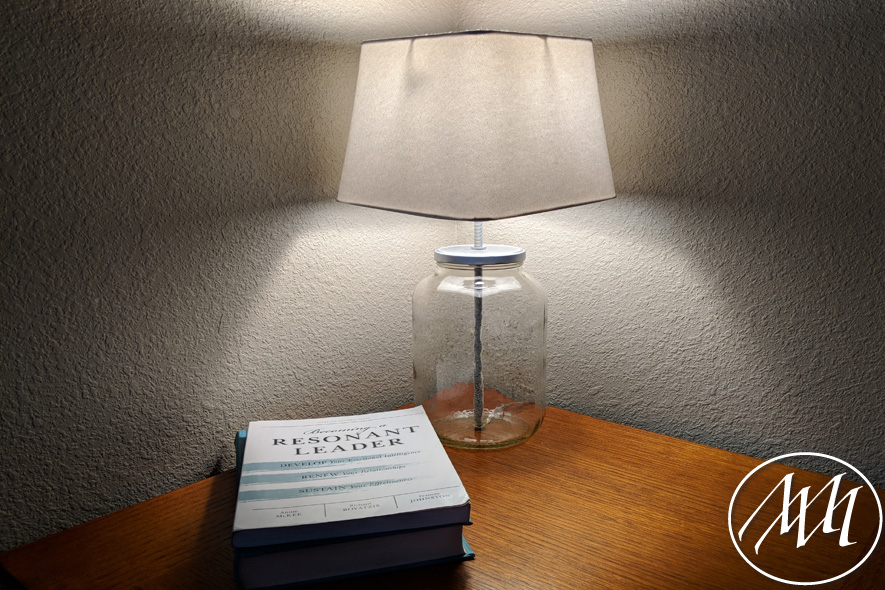
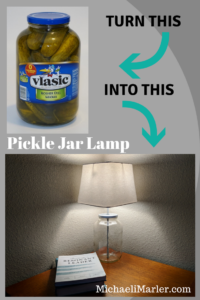
Are you looking for a unique project? Turn a basic pickle jar into a beautiful and functional lamp for your home! This is a great way to reduce, reuse, and recycle your old pickle jars!
*This post may contain affiliated links. For more information on this, please see my Disclosure page!*
Materials:
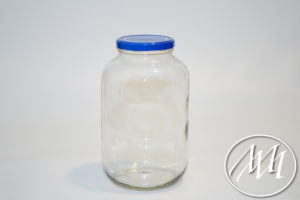
- Pickle Jar 1 Gallon
- Lamp Kit (I used this one)
- 12” All Thread Lamp Pipe Kit (I used this one)
- ⅜” Glass and Tile Drill Bit
- Drill (This is the one I have and love)
- ⅜” Drill bit
- Screw driver
- Lamp Shade
- Light Bulb
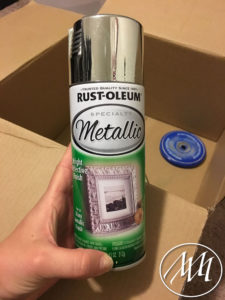
- Spray Paint (optional) I used Rust-Oleum in Metallic
Step 1:
Eat all of the pickles. This is especially easy in my household because my husband loves pickles! 🙂

Step 2:
Clean out jar and remove label and stamped date on jar. I like to use a brillo pad for this step to get it really clean and smooth.
Step 3:
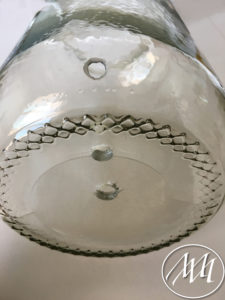
Drill three holes in the glass pickle jar: Two in the bottom and one on the side near the bottom for the wiring kit.
Note: I put the jar upside down in a small trash can to hold it still and to catch any glass particles. This also made it steady so it was easy to drill without it moving.
Step 4:
Drill a ⅜” hole into the top of the pickle jar lid to make a way for the thread kit to come through the top. You may need to sand it a little to make it smooth.
Step 5:
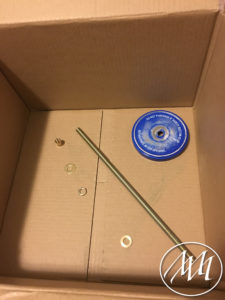
Spray paint the top of the jar and thread pipe kit if desired. I wanted all the pieces to match, but you can choose a gold kit on Amazon and not have to spray paint anything but the lid. Allow time to dry before you try to put the pieces together.
Note: I like to put the pieces I’m spray painting into a box so the paint overspray stays contained in the box.
Step 6:
Follow the lamp kit instructions for wiring the pieces together, but here’s the order they should go with my instructions for what I did. Here’s also a video of me putting mine together:
- Weave the wiring through the side of the jar, then the off centered hole in the bottom of the lamp.
- Add the nut that will hold the threaded pipe in place at the bottom of the lamp next over the wire, then thread the wire through the center hole at the bottom of the lamp. Make sure that all of the wire pieces are straight so the lamp will sit flush with the surface its sitting on.
- Thread the wires through the threaded pipe and push through the bottom of the jar. Tighten the nut that was at the bottom of the jar to secure the pipe in place.
- Put the pickle jar lid through the wire and the pipe and push down until it screws and clicks into place.
- Add the washer screw* to the top of the jar lid.
- Add the pipe extension piece* to the top of the threaded pipe for added stability and height and then the extra piece of small threaded pipe*.
- Screw in the bottom of the light bulb socket into the threaded pipe and tighten with a screwdriver.
- Tie a loose knot with the top of the wires. You may have to adjust how much wire is coming out of the top of the lamp by pulling it down through the lamp.
- Unscrews the screws on the light socket that will hold the wires. Wrap the appropriate colored wire to the appropriate screw (will be in kit instructions) and tighten screws to hold wires in place.
- Adjust the knot you made earlier with the wires so they’ll fit snuggling in the socket. You may need to pull the wire down through the lamp a little more.
- Fit the socket sleeve over the socket and push down until it clicks into place with the socket. Note: This will not come back apart easily if something was not done correctly, so make sure it’s ready to move forward!
*piece that came with the threaded pipe kit
Step 7:
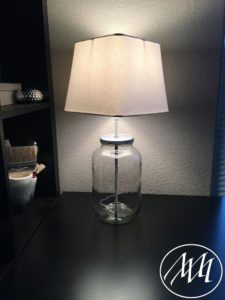
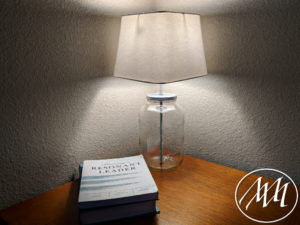
Add the lampshade, light bulb, and plug it in! You just made an adorable lamp out of a pickle jar! This is the perfect recycling project and a great way to get your feet wet with making your own lamps!
You are so talented and I love how you can repurpose things in the house. Heck, you made an awesome lamp base out of a pickle jar. So creative and super cute!
Thank you so much, Amandela! I really appreciate your encouragement! 😀
This is such a great project, I would have never thought to turn a pickle jar into a lamp. Very cute!
Thank you so much, Nicole!
Very cool, looks like something right out of the furniture store. It’s got that rustic feel to it. Plus you get to say it was made from a pickle jar!
Thank you so much for the nice comment and encouragement! I really appreciate it!
I made 2 of these years ago. I put flowers in them, birdhouses when that was the rage. I now have just a band of burlap around them. Anyone have ideas of what I can put in them with a water theme decor, beside sea shells.
Maybe you could do sand and seashells together? Or maybe little anchors? Or, maybe you could paint the outside with a theme?
This is awesome! I’m always looking for new ways to reuse my pickle jars and this is a DIY I have never seen. So creative, thanks for sharing!
Thank you, Ashley! So happy you enjoyed it! (I still have this lamp on my side table!) 🙂