
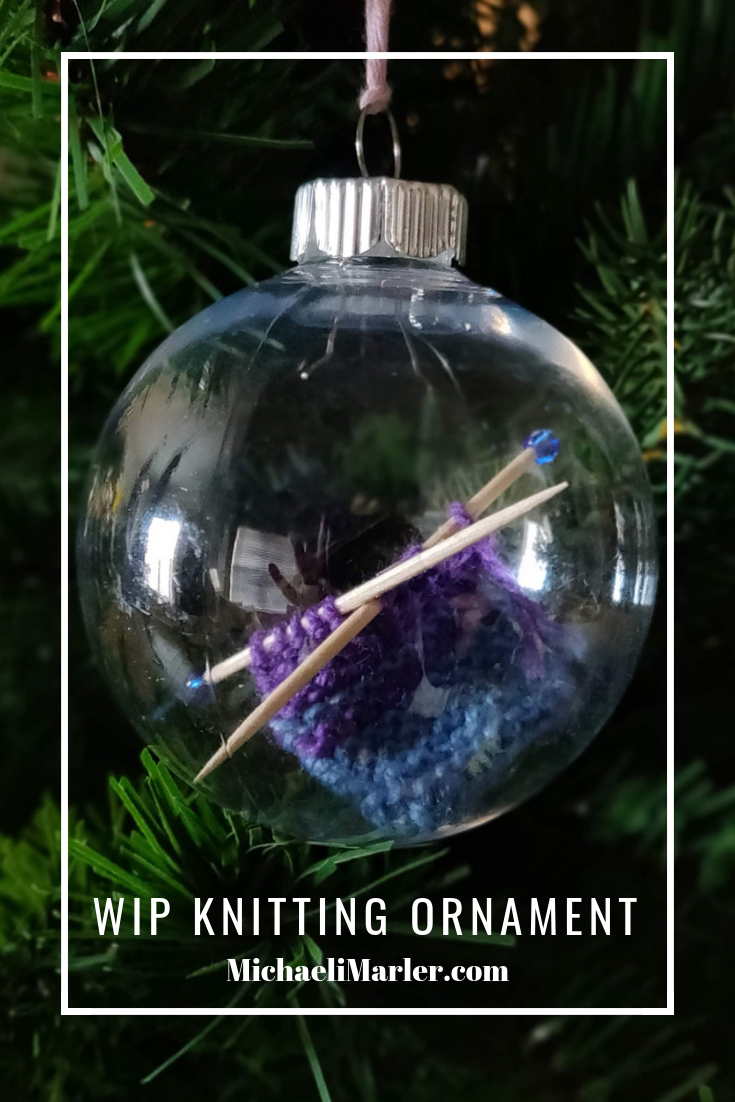
This adorable knitting ornament is the only WIP (Work in Progress) you shouldn’t finish! It’s cute the way it is!
*This post may contain affiliated links. For more information on this, please see my Disclosure page!*
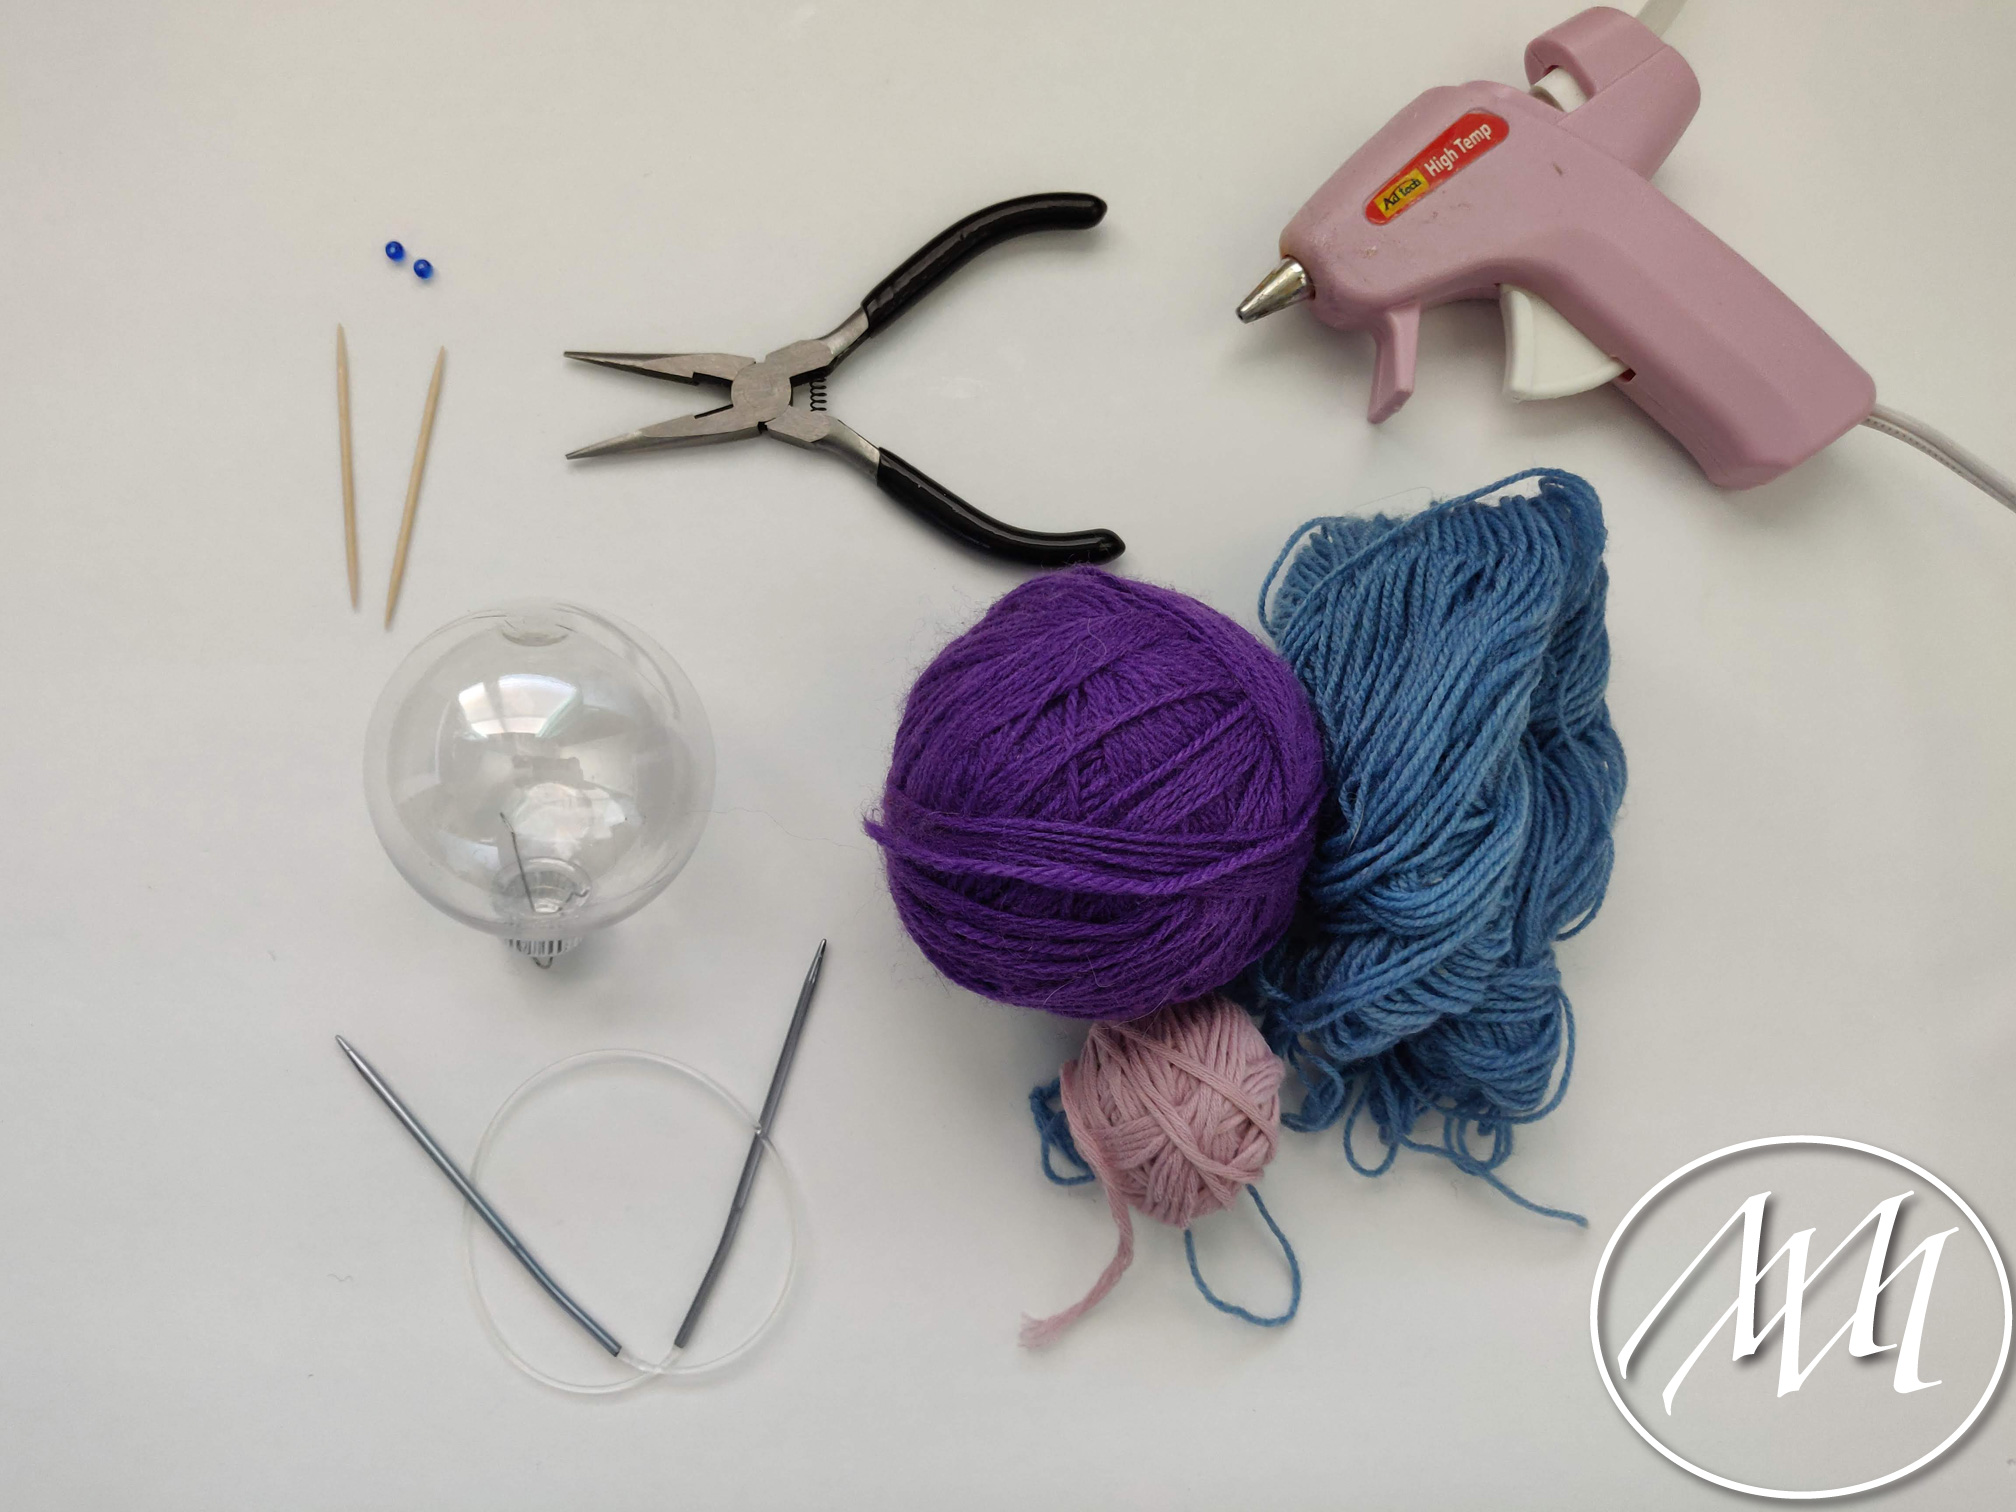
Materials:
- Plastic Clear Ornaments
- Scrap Yarn
- Size two knitting needles
- Toothpicks
- Seed Beads
- Glue Gun
- Scissors
 Step 1:
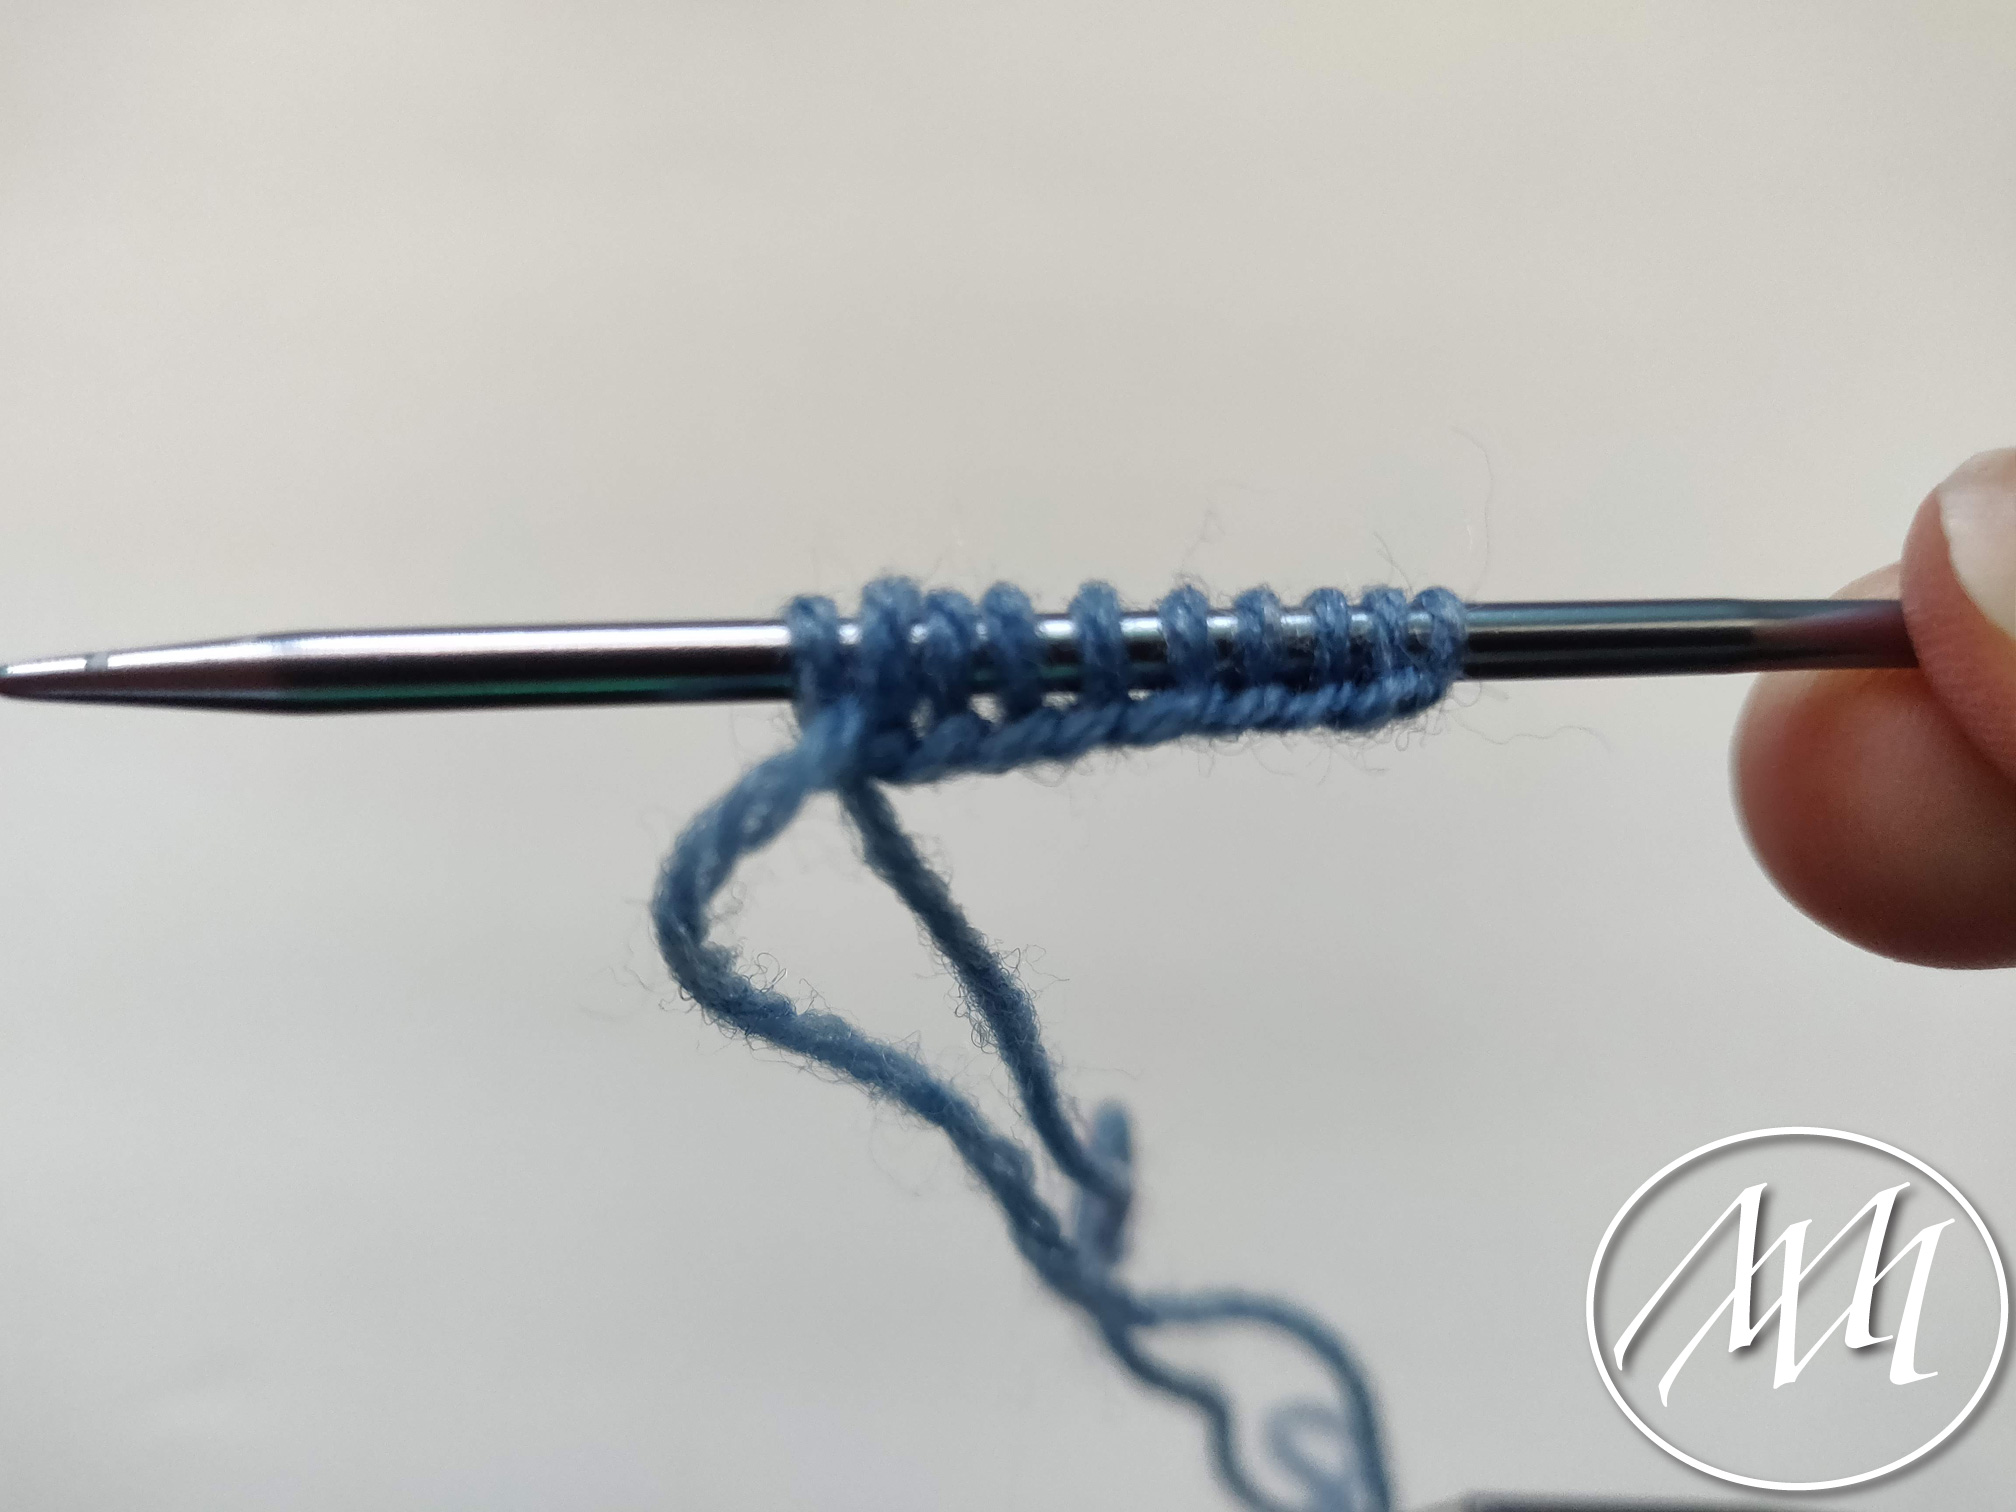
Cast on 10 stitches to your size two knitting needles.
 Step 2:
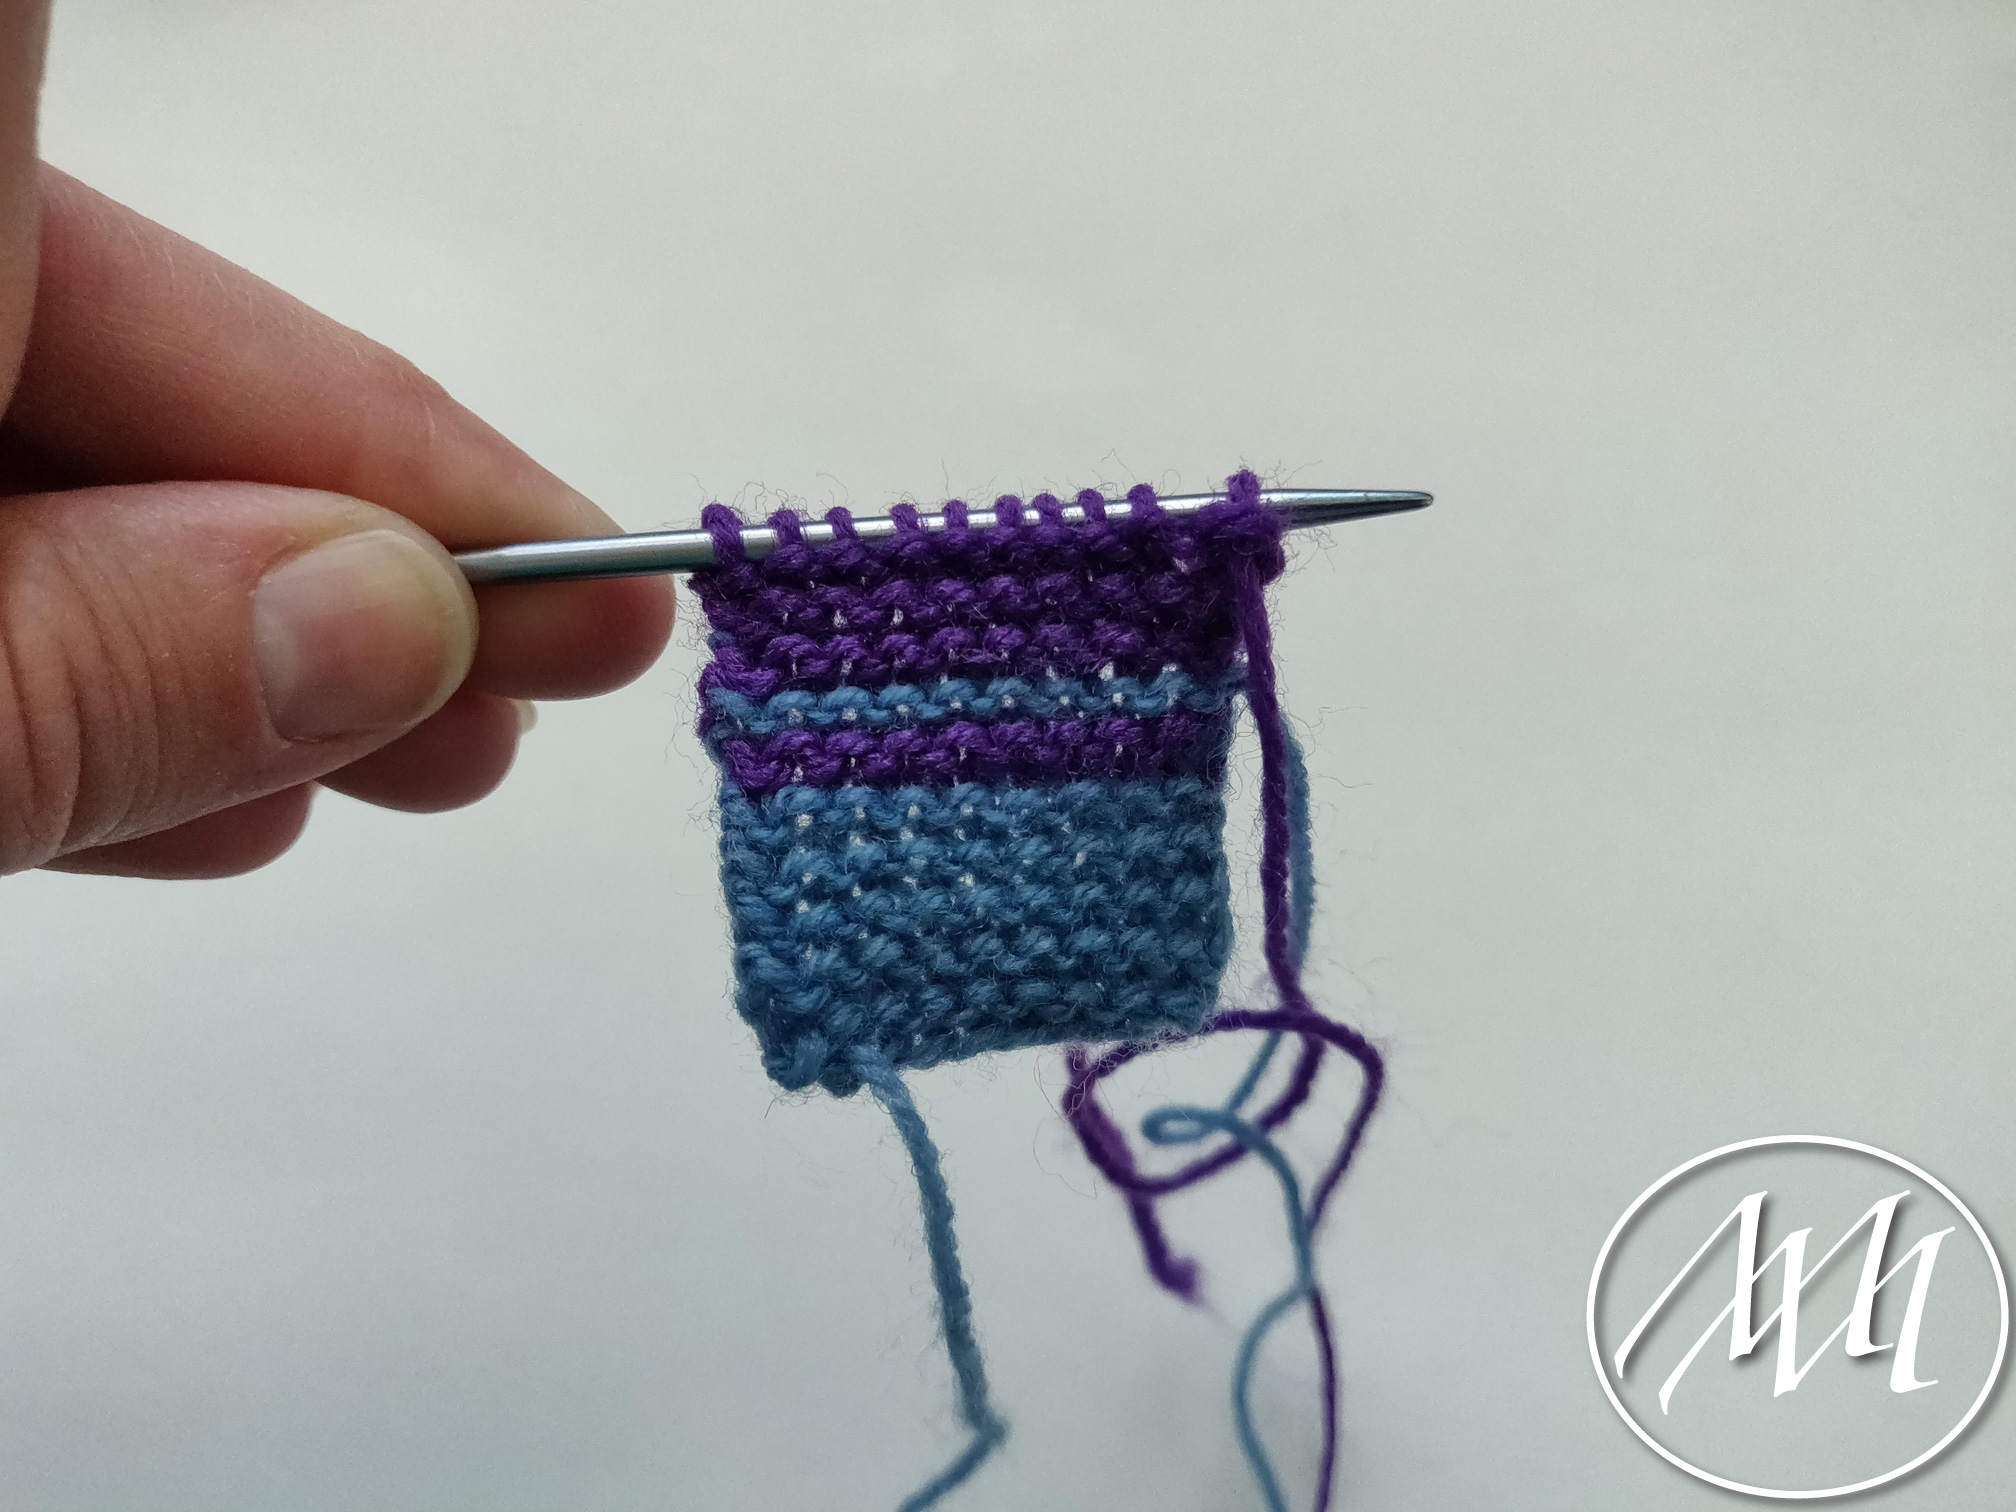
Knit about 10-20 rows depending on the weight of your yarn. I used fingering weight, so I did closer to 20. I also decided to do a stripe and then switch colors for some more interest!
 Step 3:
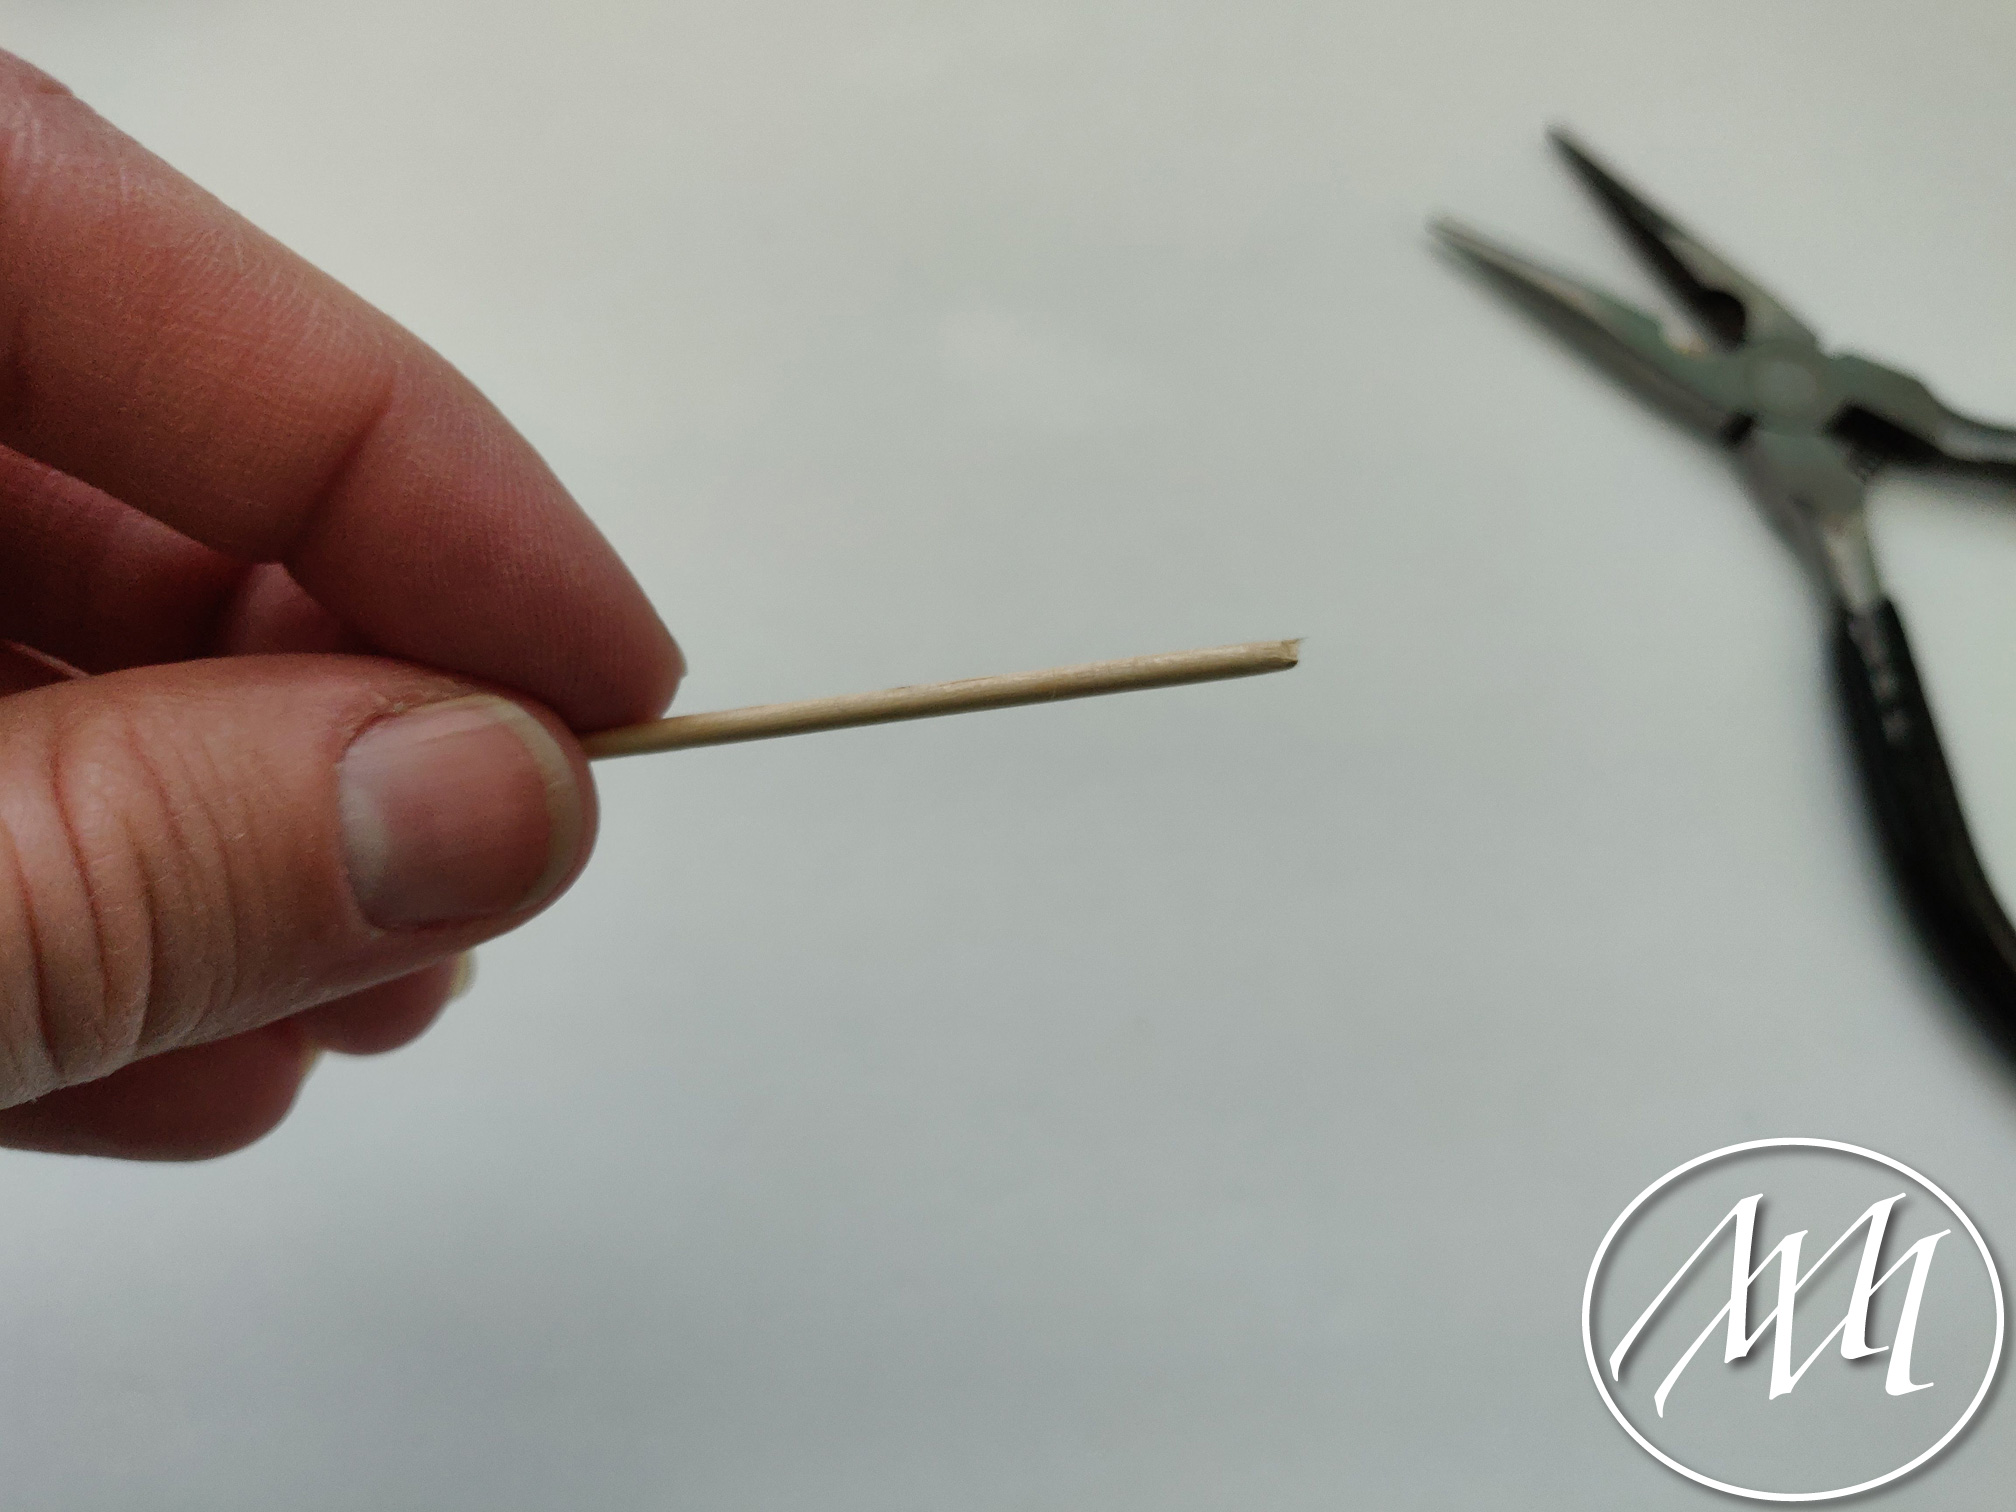
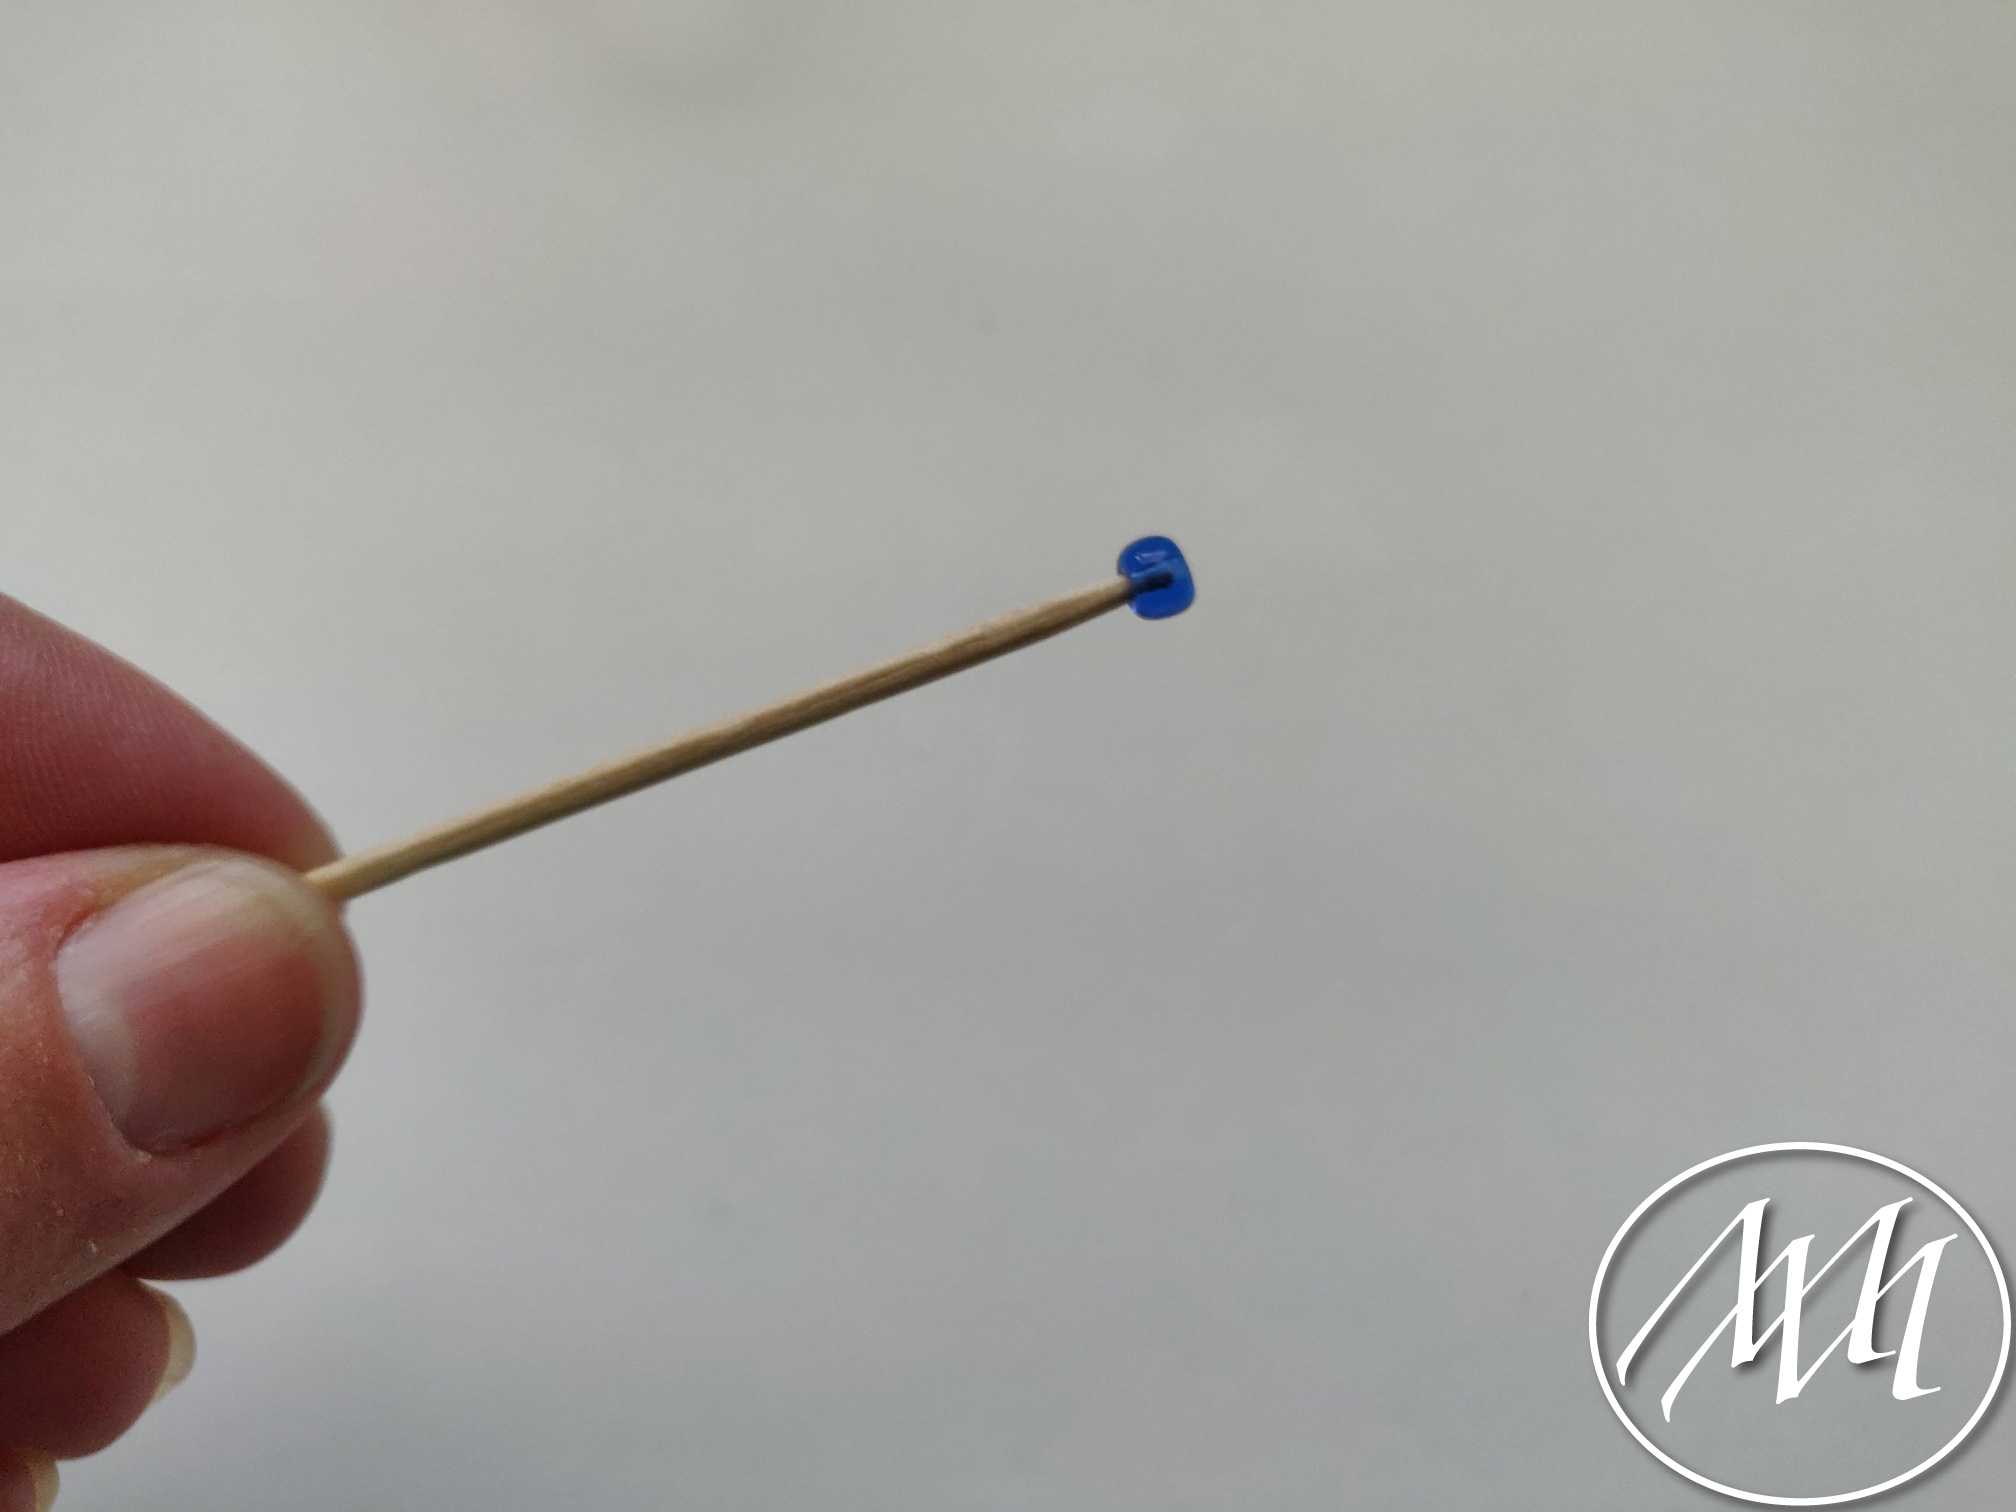
Heat up your glue gun. Trim off the pointy part of two toothpicks just a little bit.
Add a little bit of glue to the end of your toothpick and attach your seed bead. These are your “knitting needles”.
 Step 4:
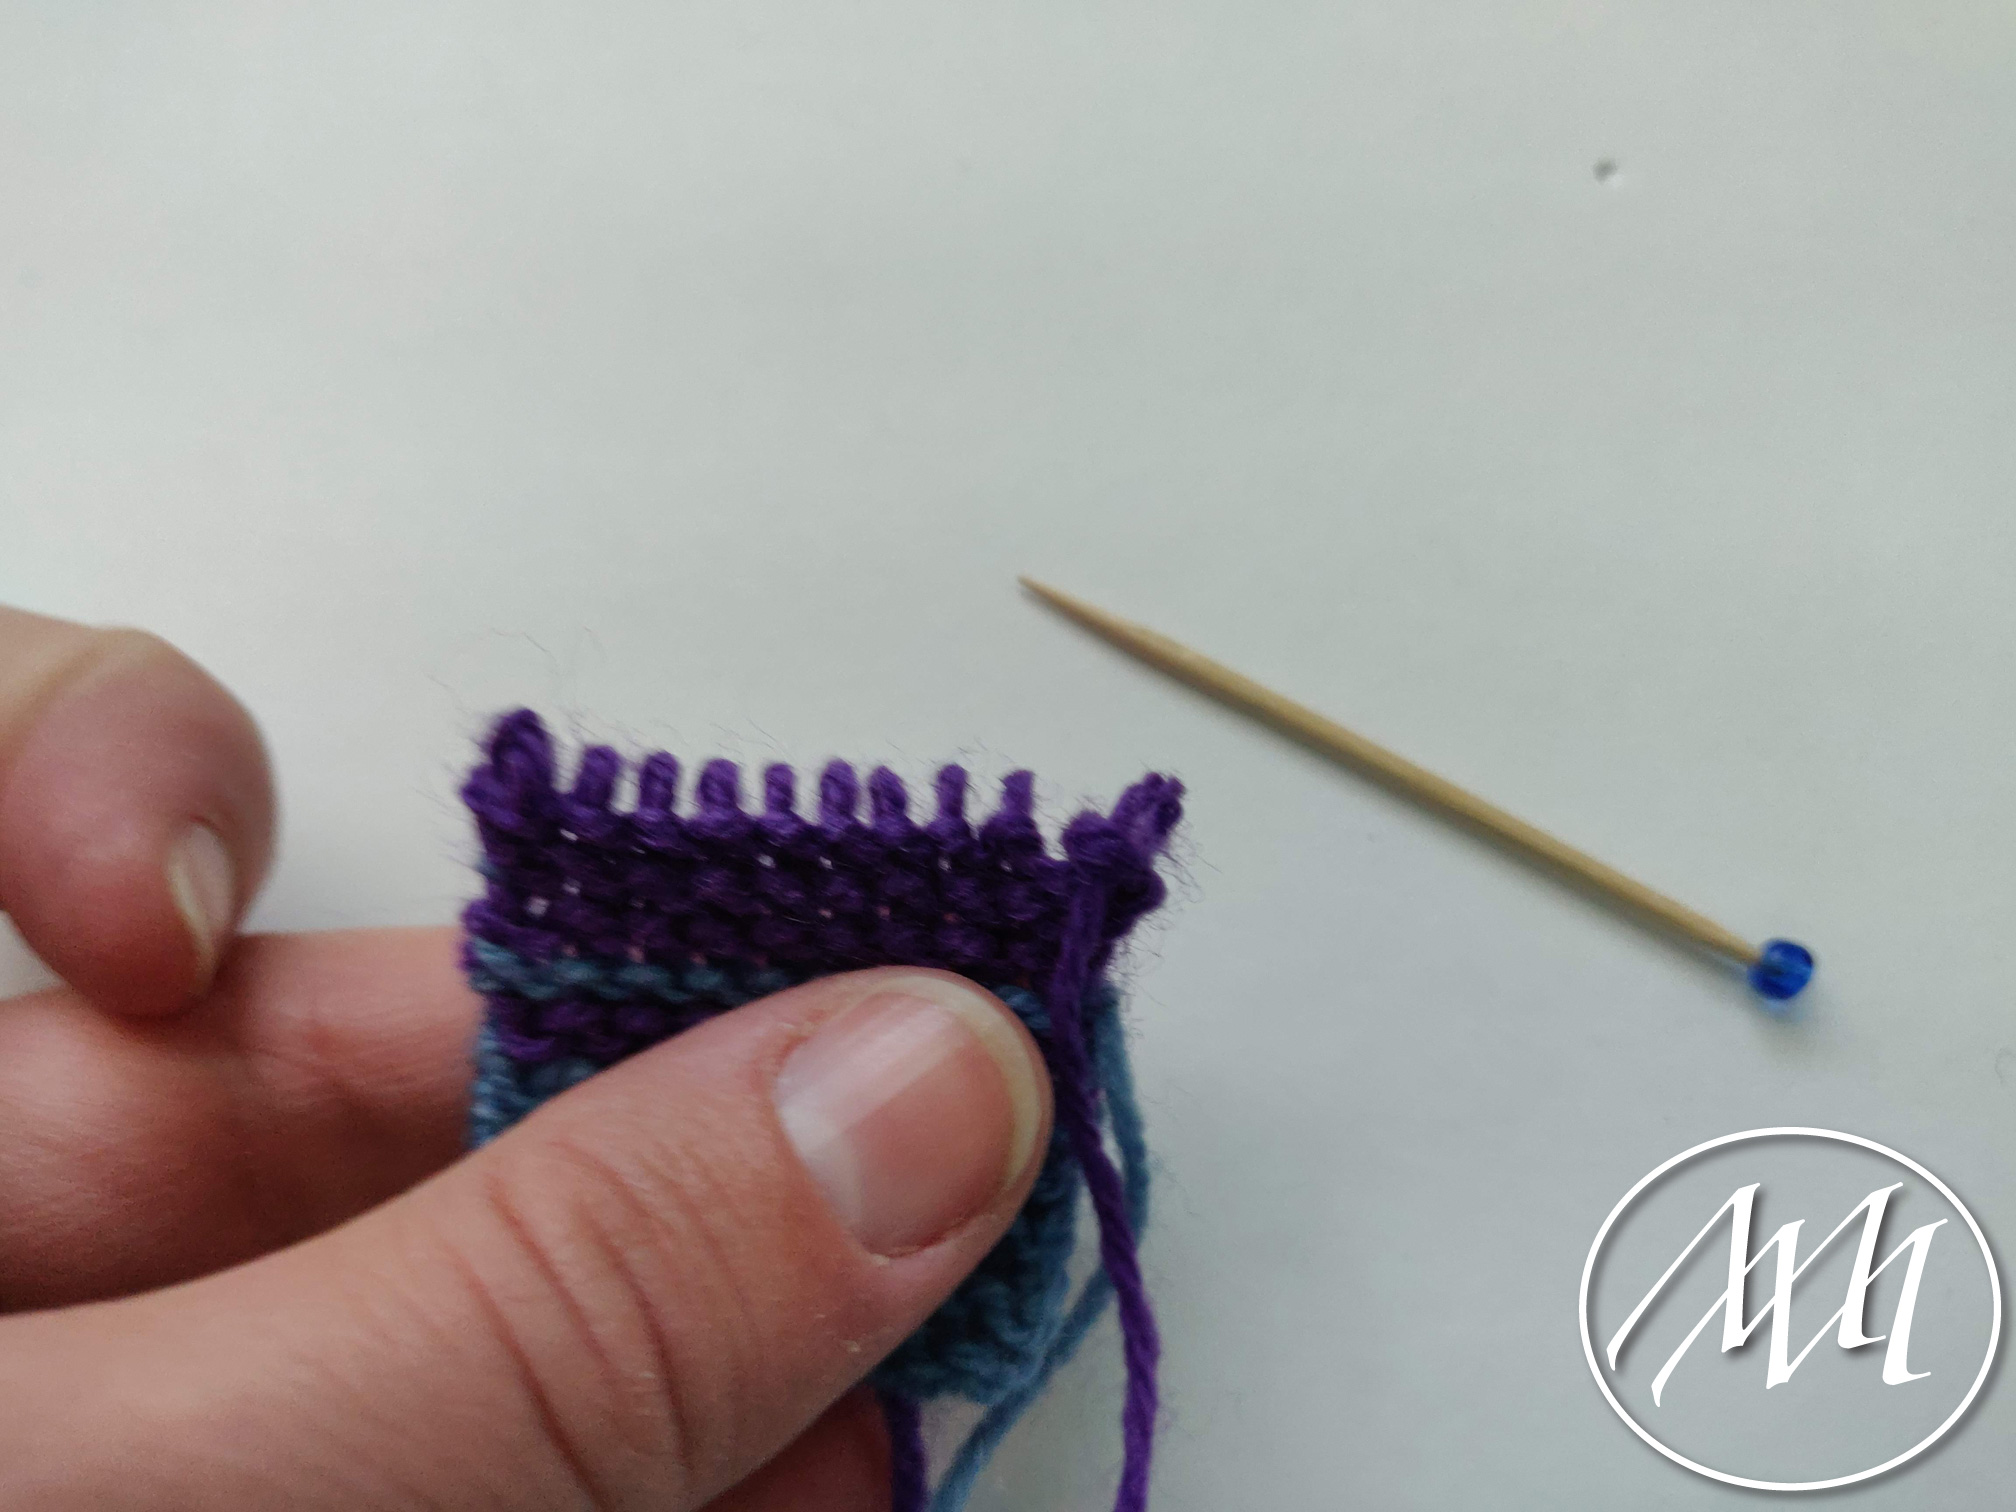
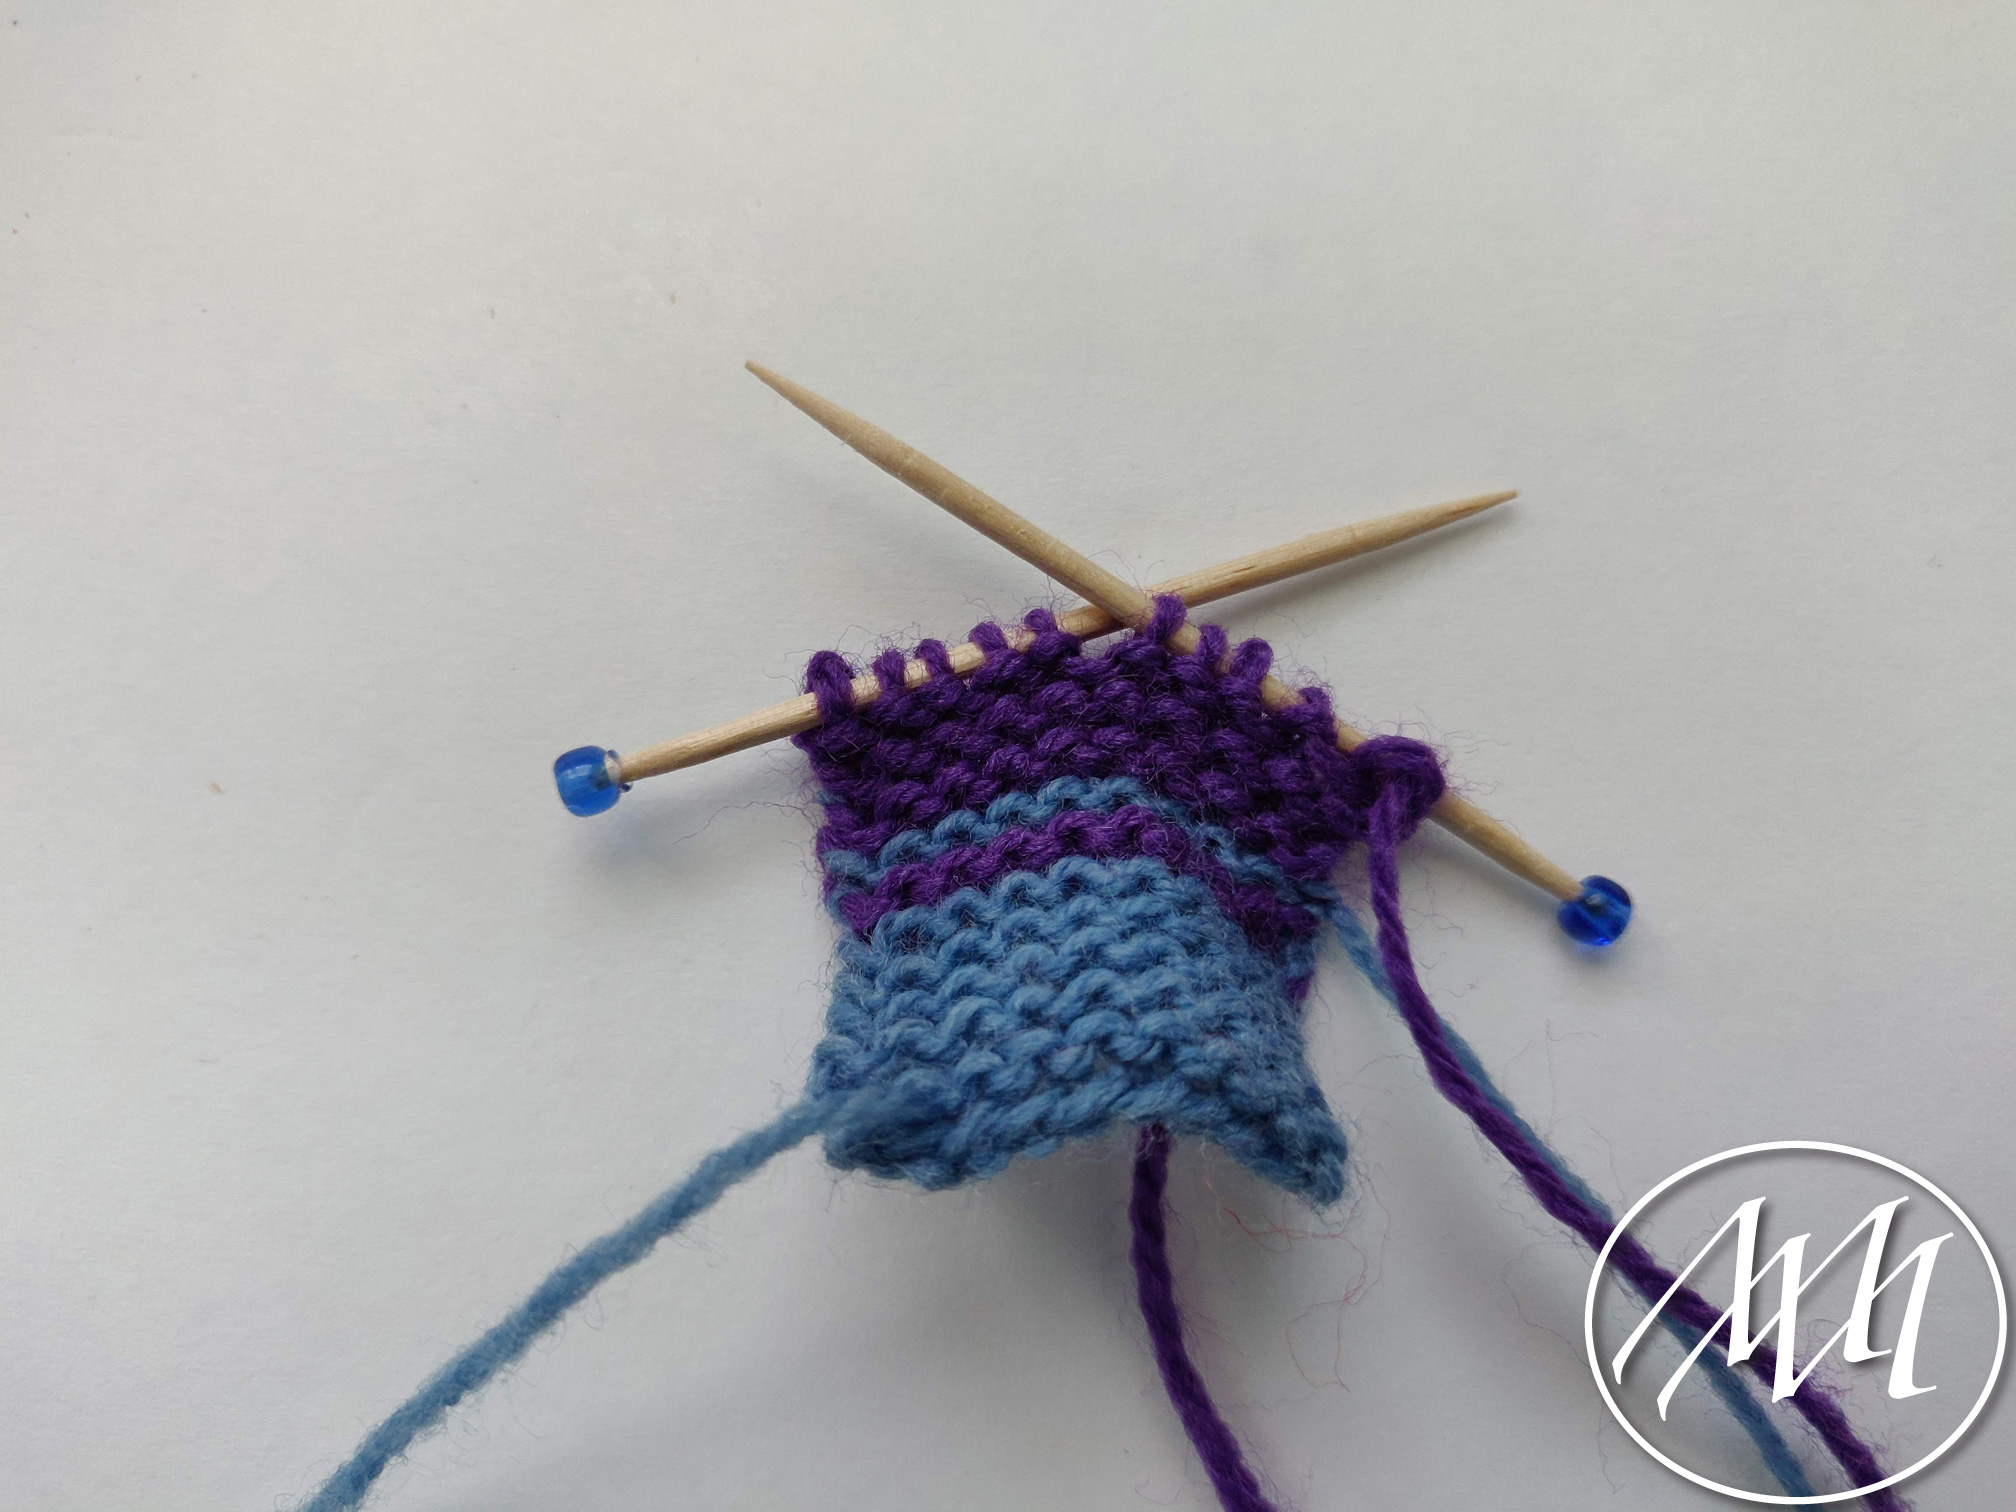
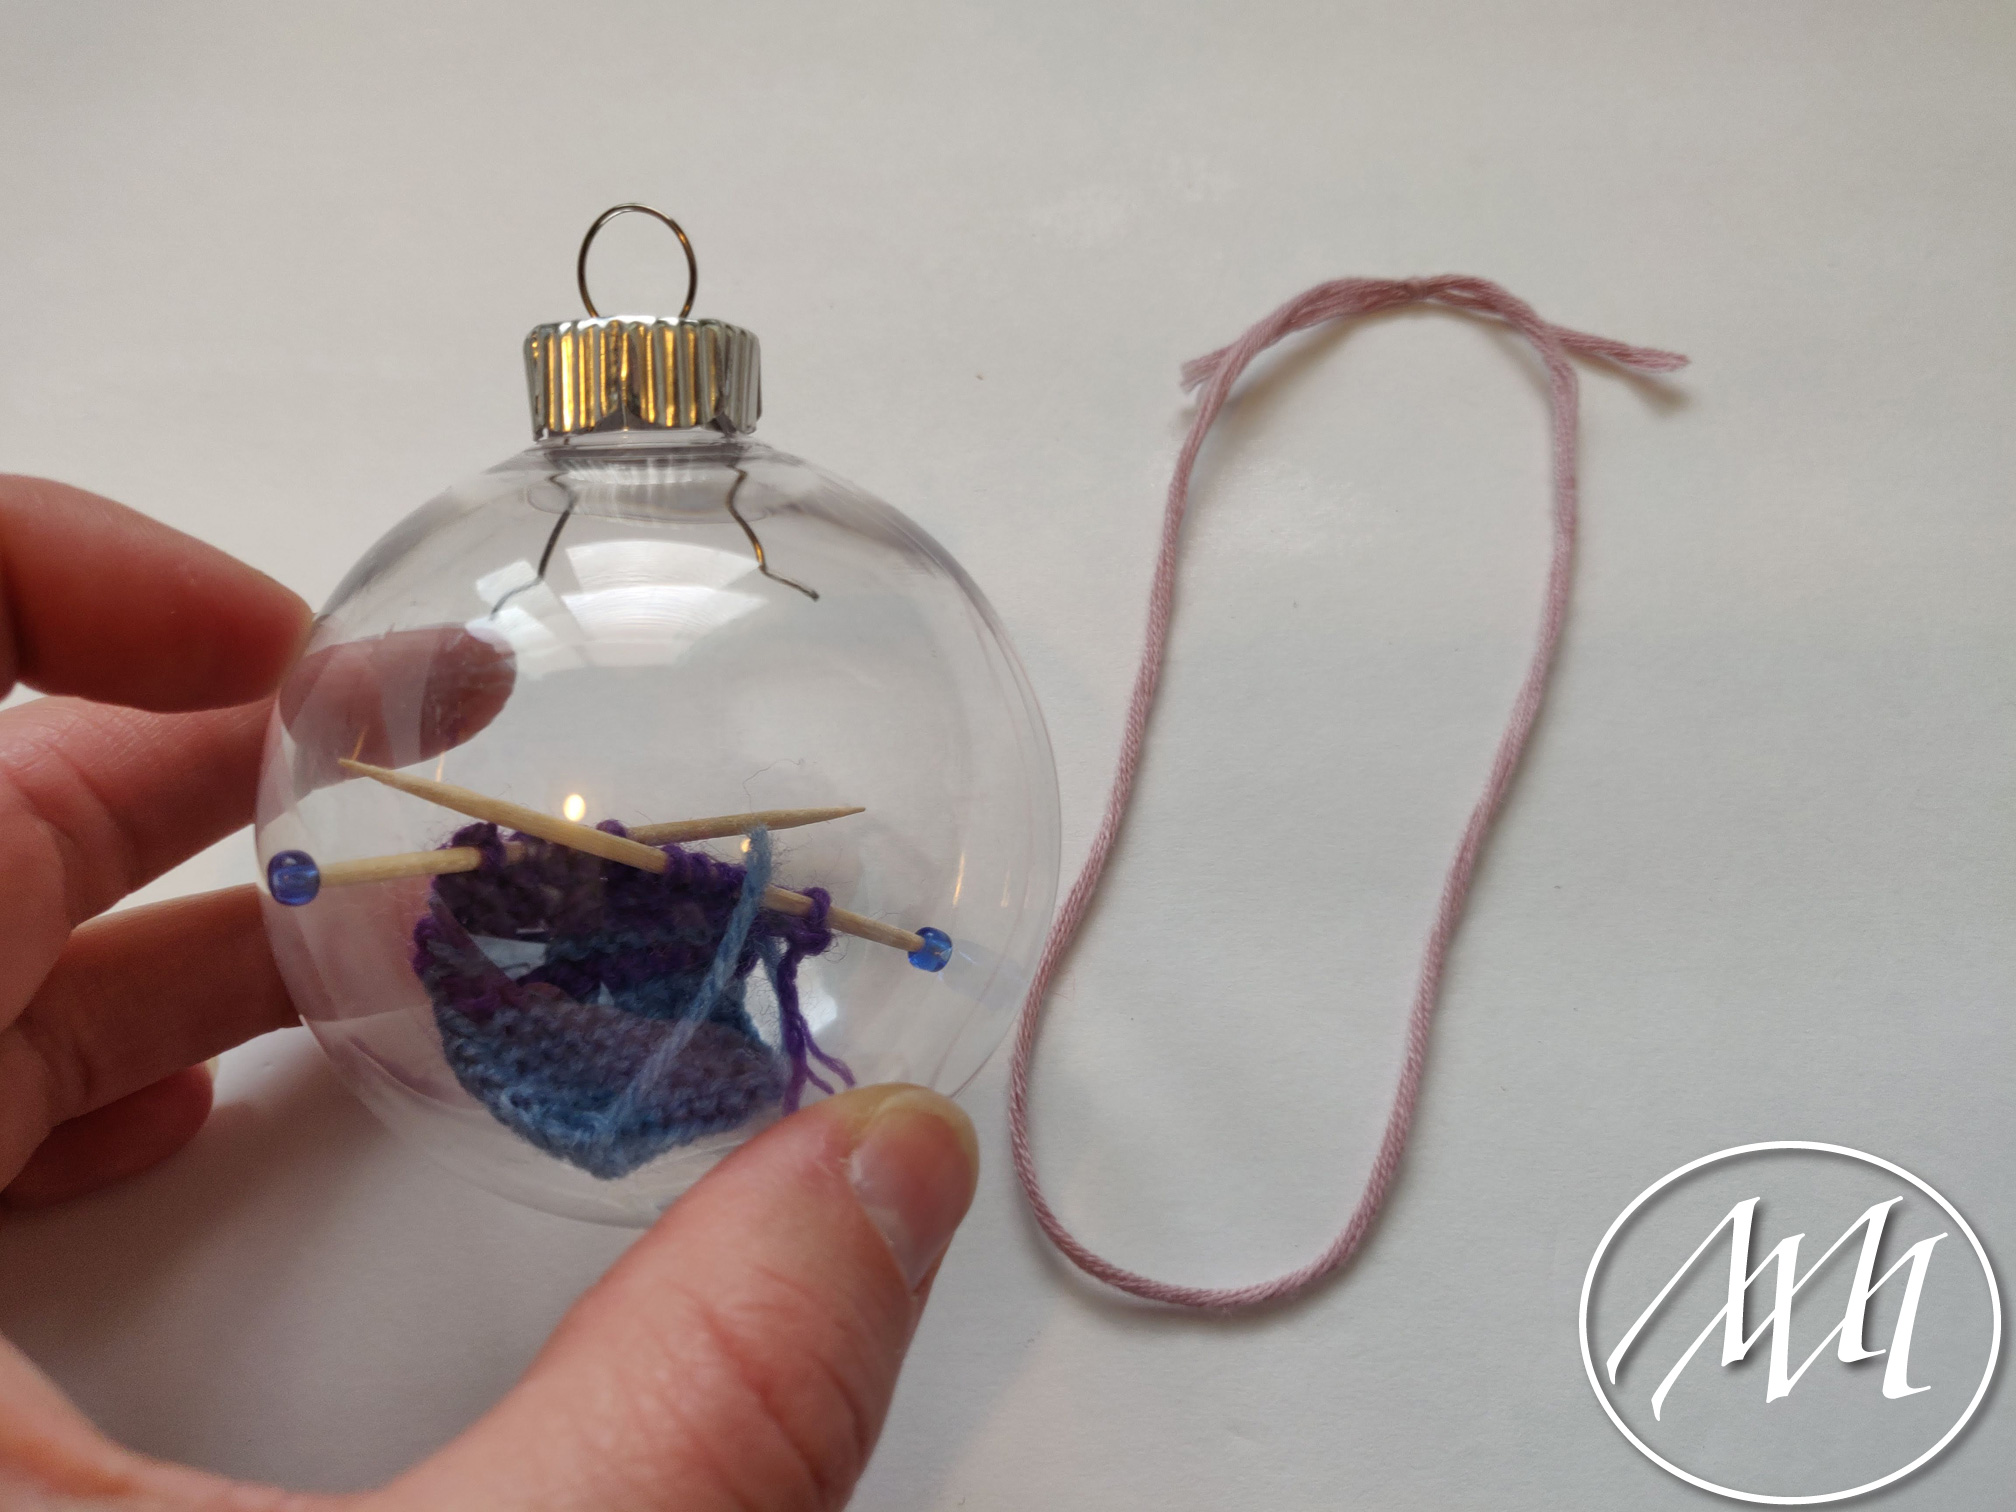
Slip your stitches from your real knitting needles to your toothpick ones. I divided mine up 5 stitches on each “needle”.
 Step 5:
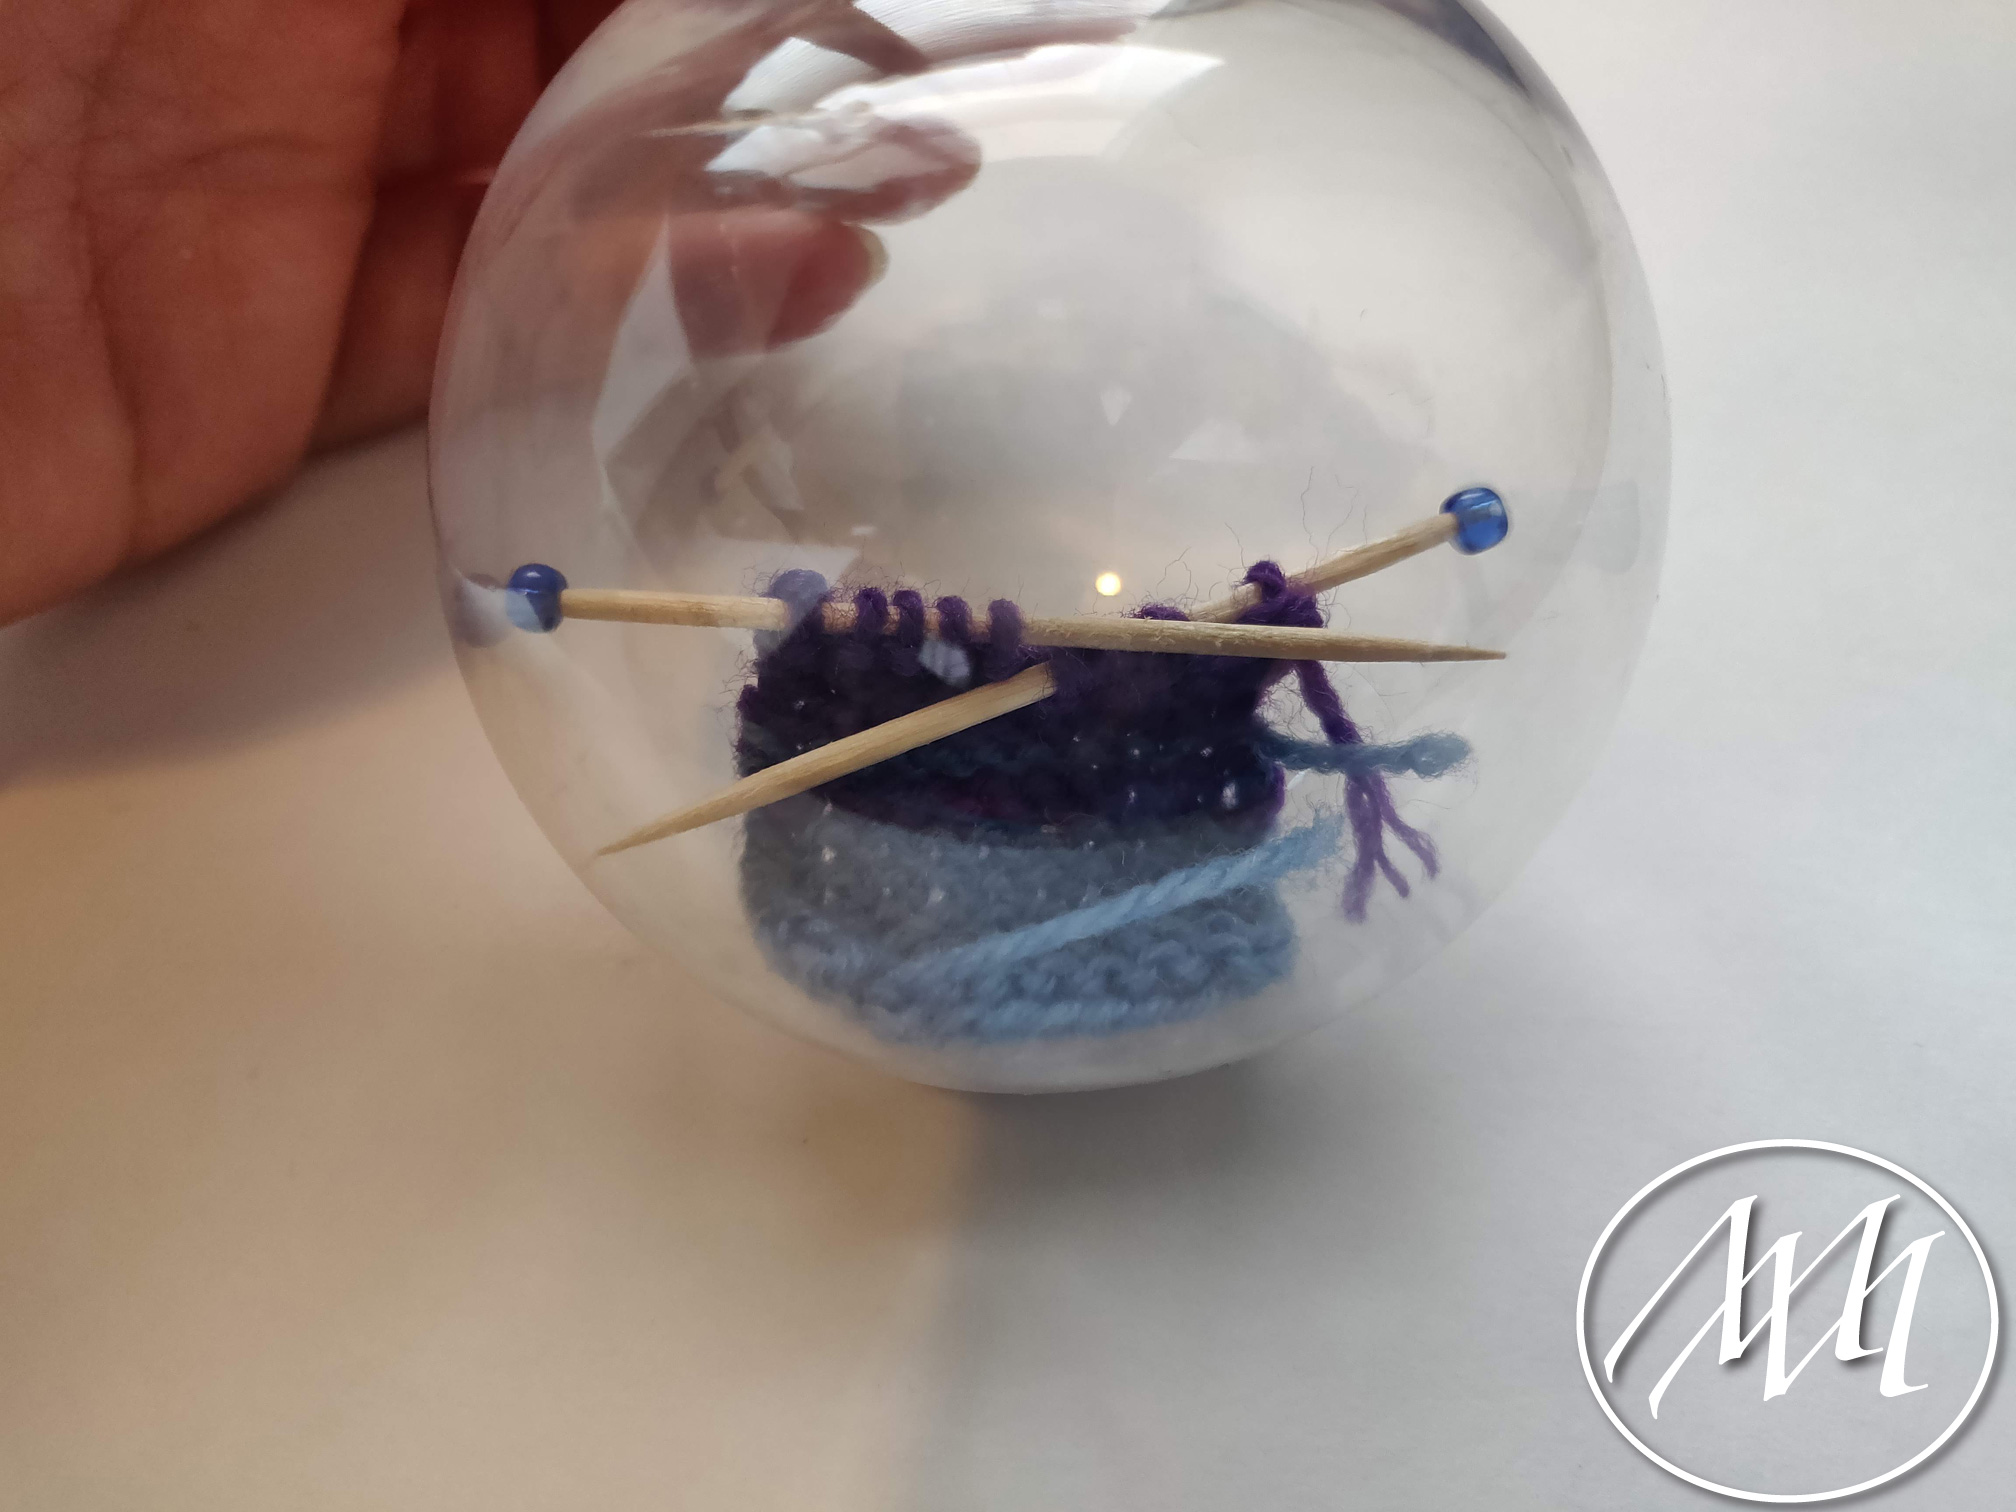
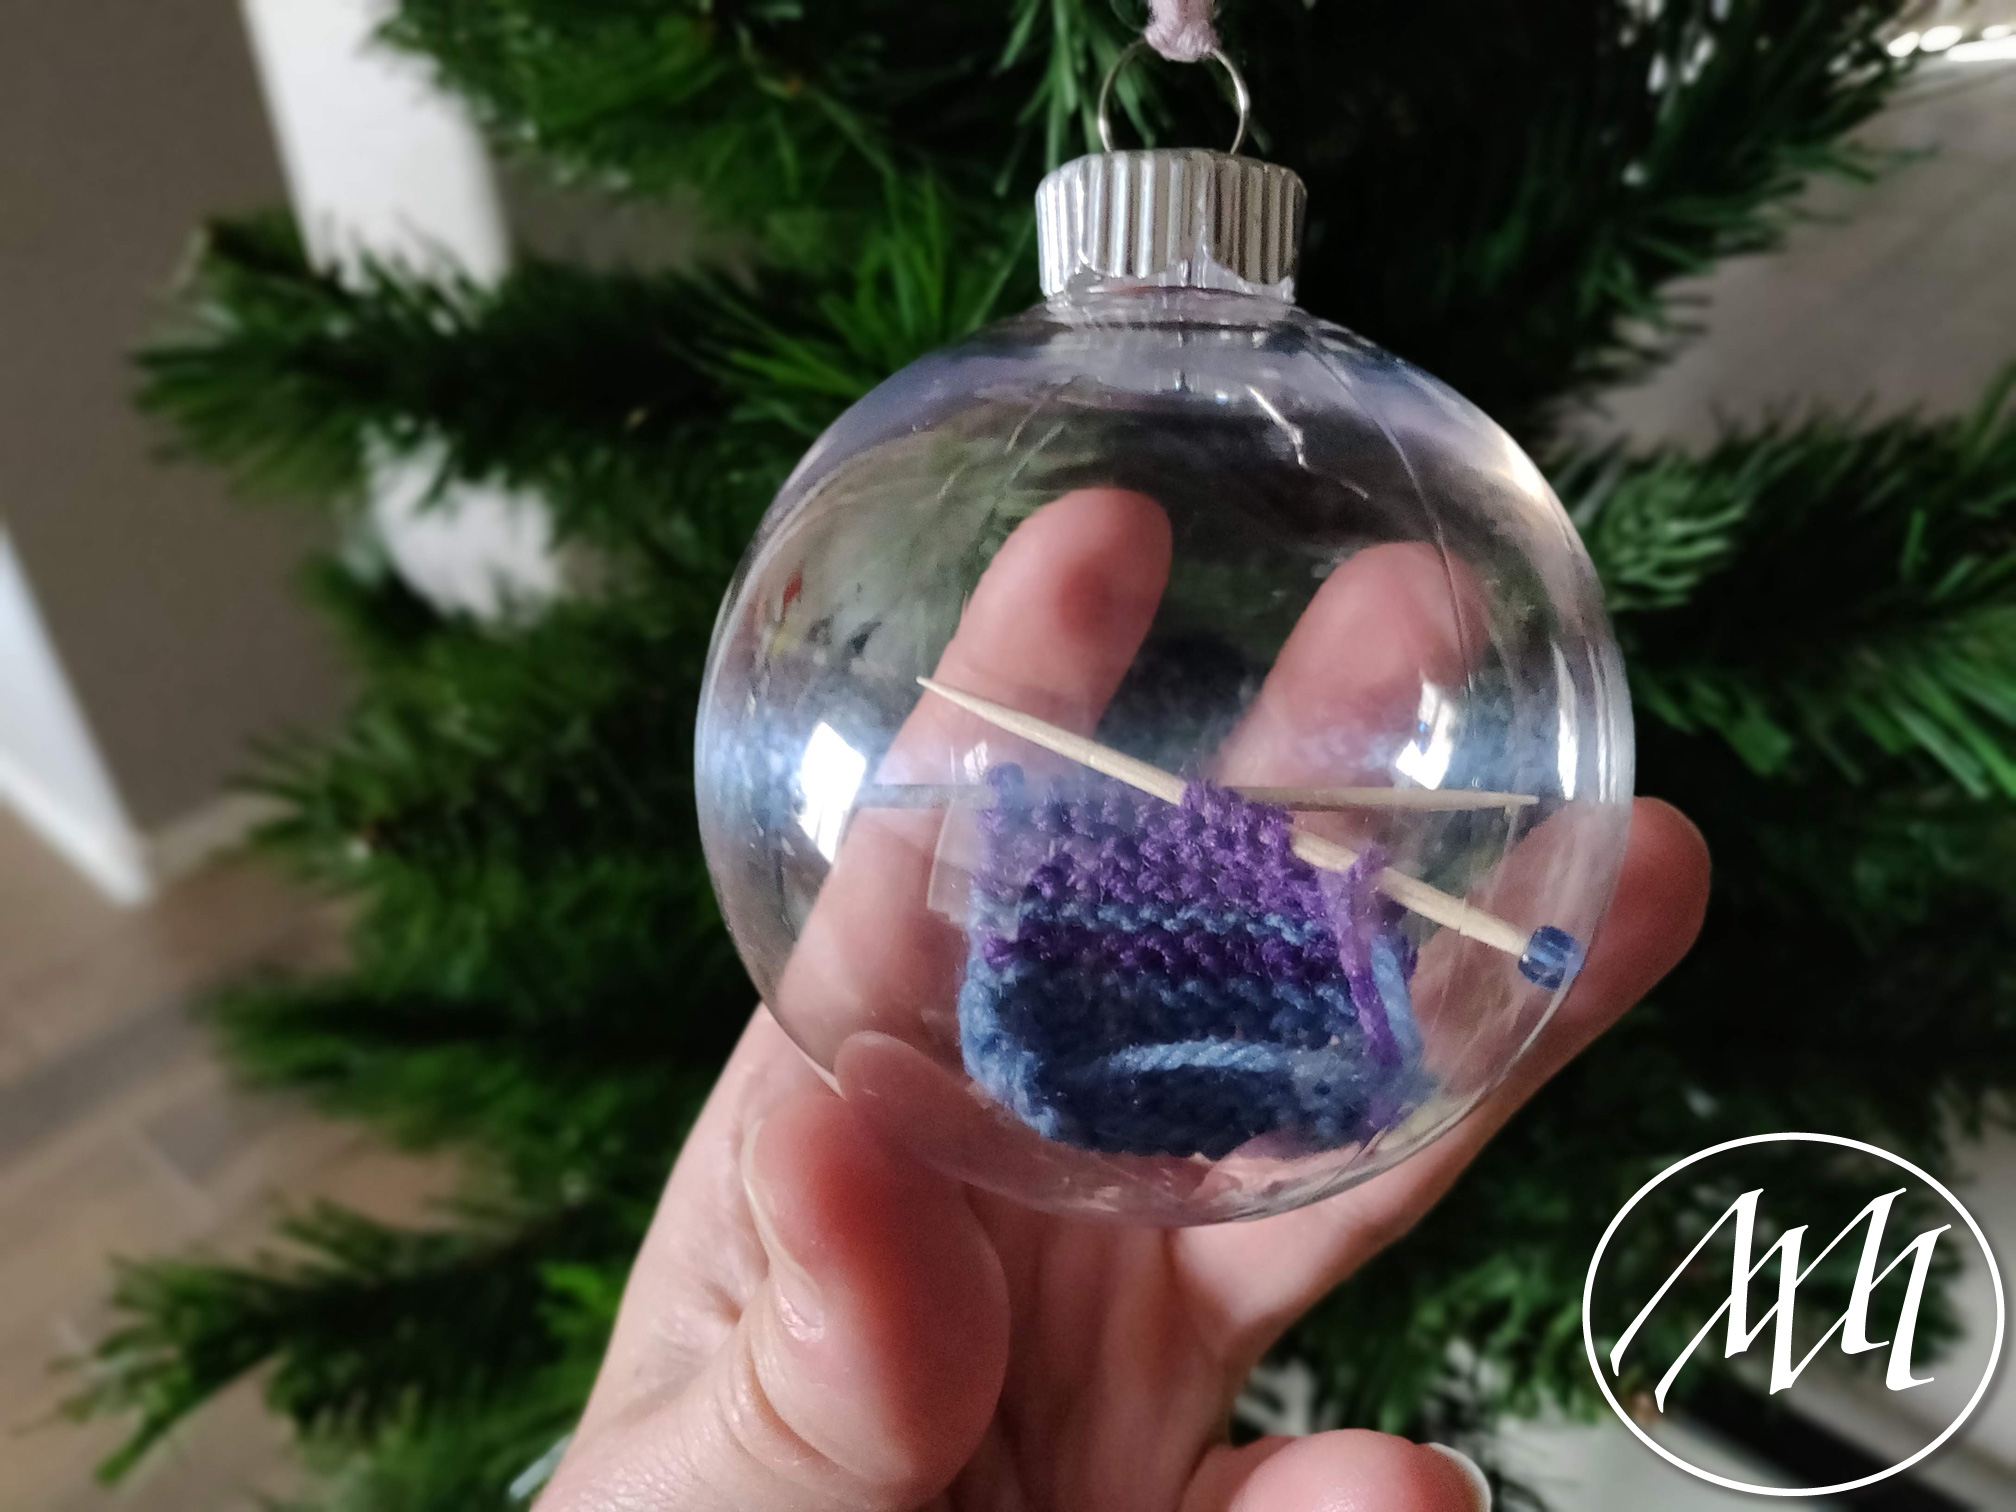
Roll up your knitting piece with the needles and put them inside your clear ornament. You may need to shake your ornament a little bit until it settles where you want it.
 Step 6:
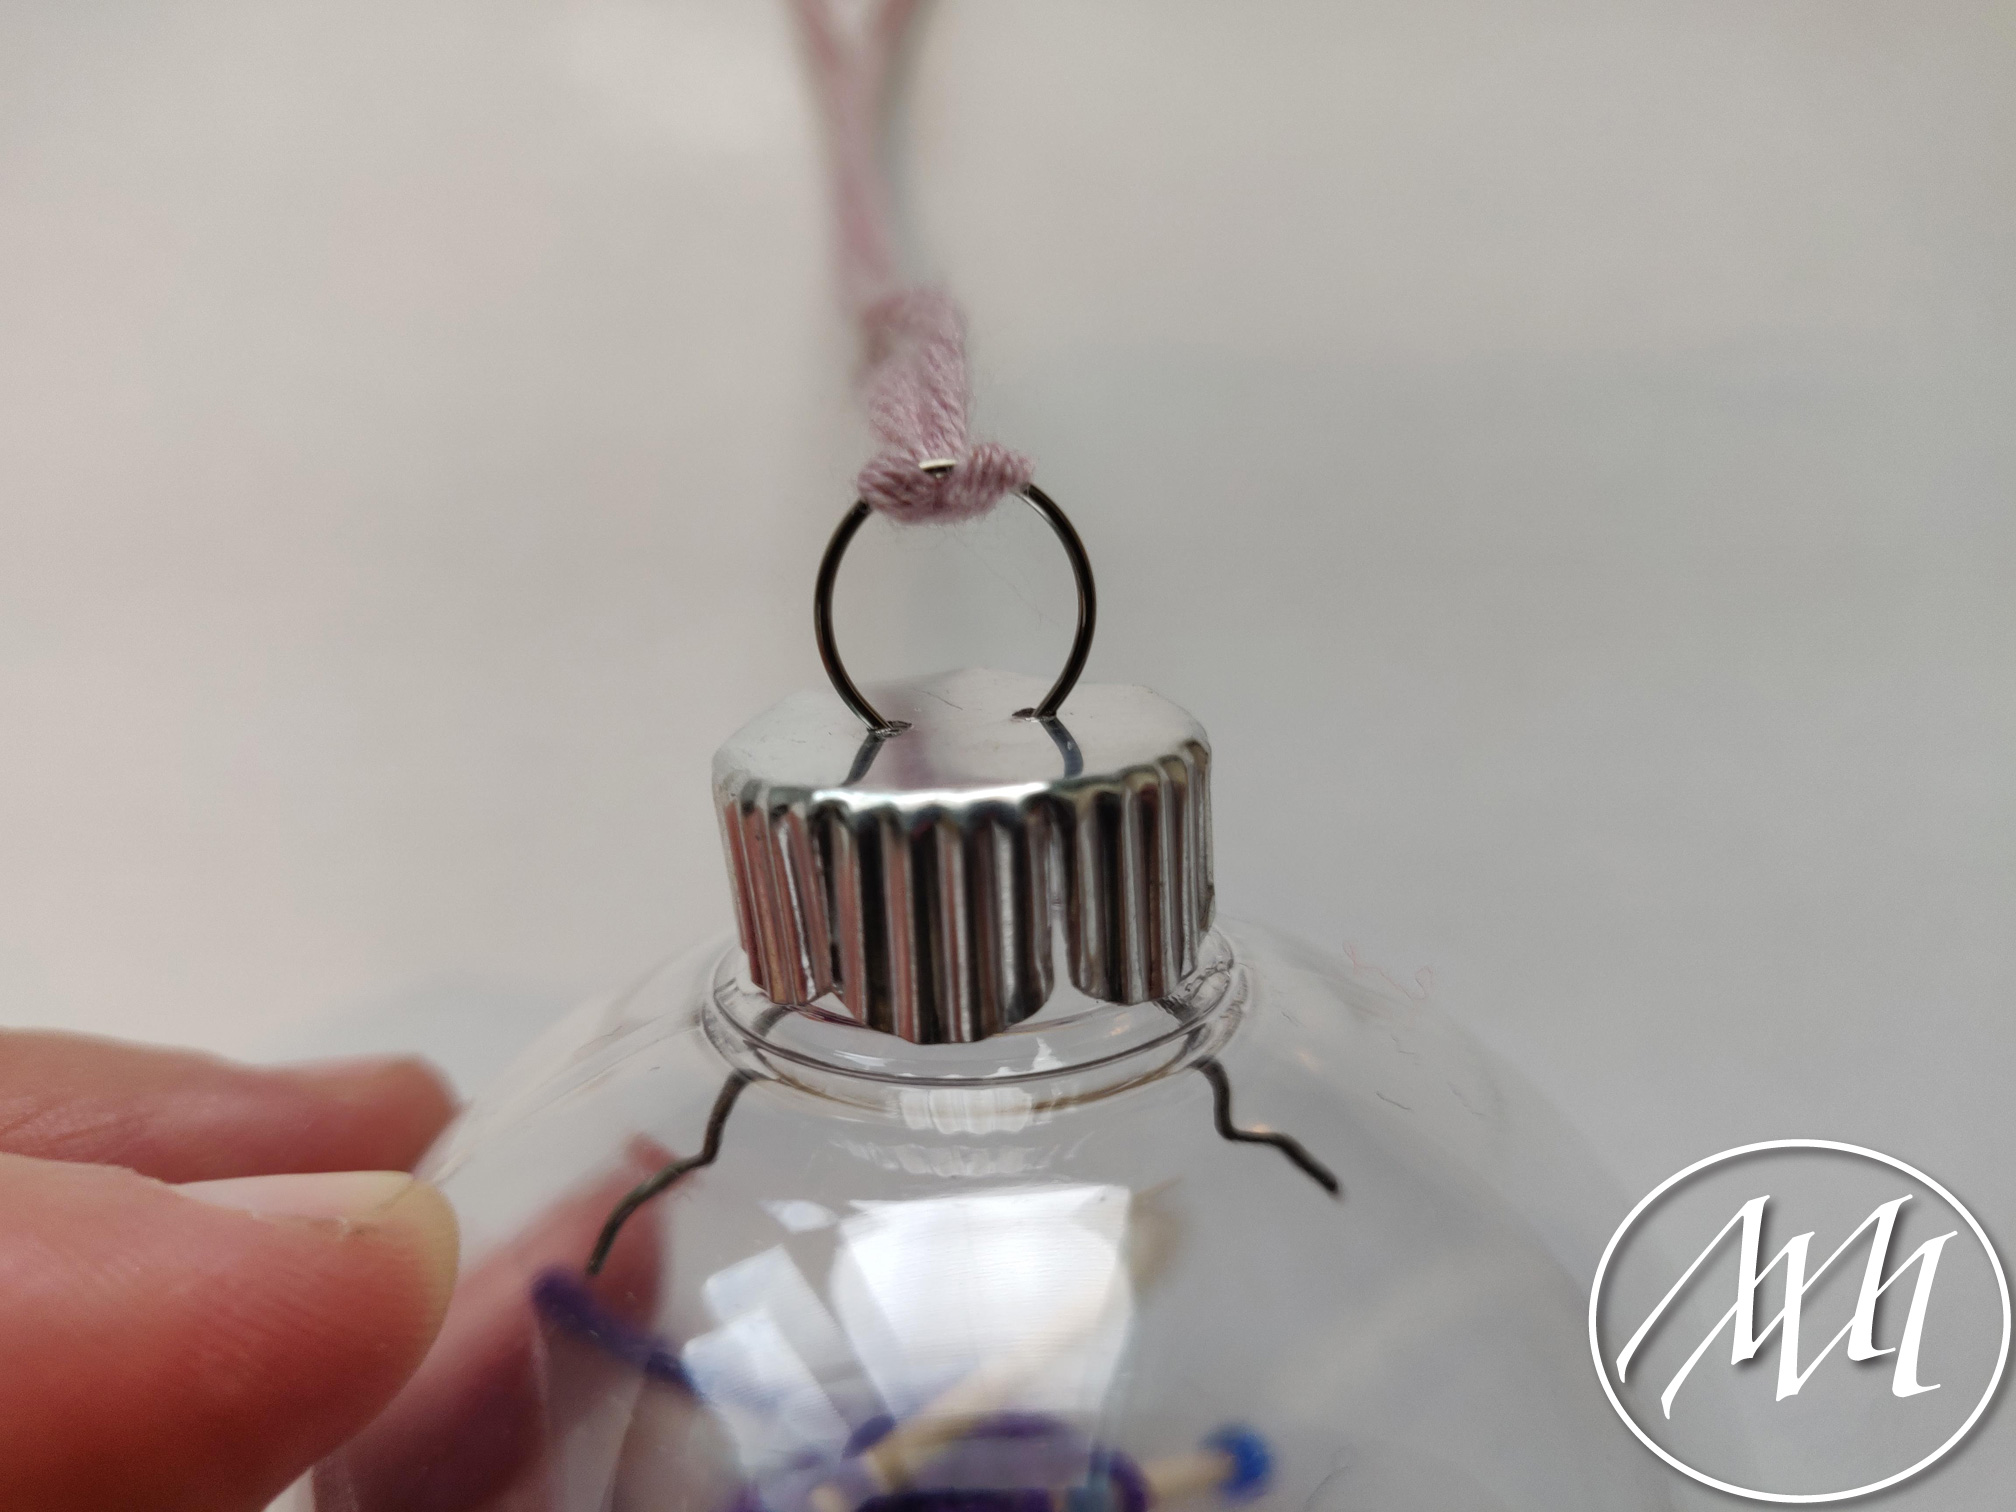
Attach the top of the ornament to close it up and tie a little piece of string around it to hang.
 Step 7:
Hang your new ornament on your Christmas Tree or give it as a gift to your knitter friends/family.

Hi! I don’t know what size bead seeds to order. Not mentioned in your pattern. I ordered #2 mm, but too small.
Thanks,
Katrina
Oops! I posted wrong e-mail address. What size beads should I order?
Thanks, Katrina
Hi Katrina,
I just tried some beads I had on hand until one fit the way I liked, but I think size 4 MM would work well! You can also cut off part of the toothpick!
Happy making!
Absolutely adorable! Making some tonight with red yarn so it looks like a Santa suit is on the needles!
Cute!!!