

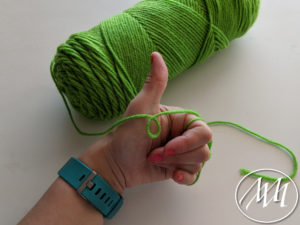
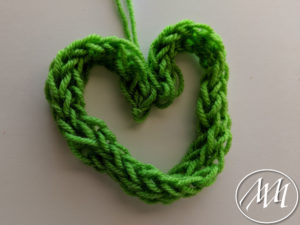
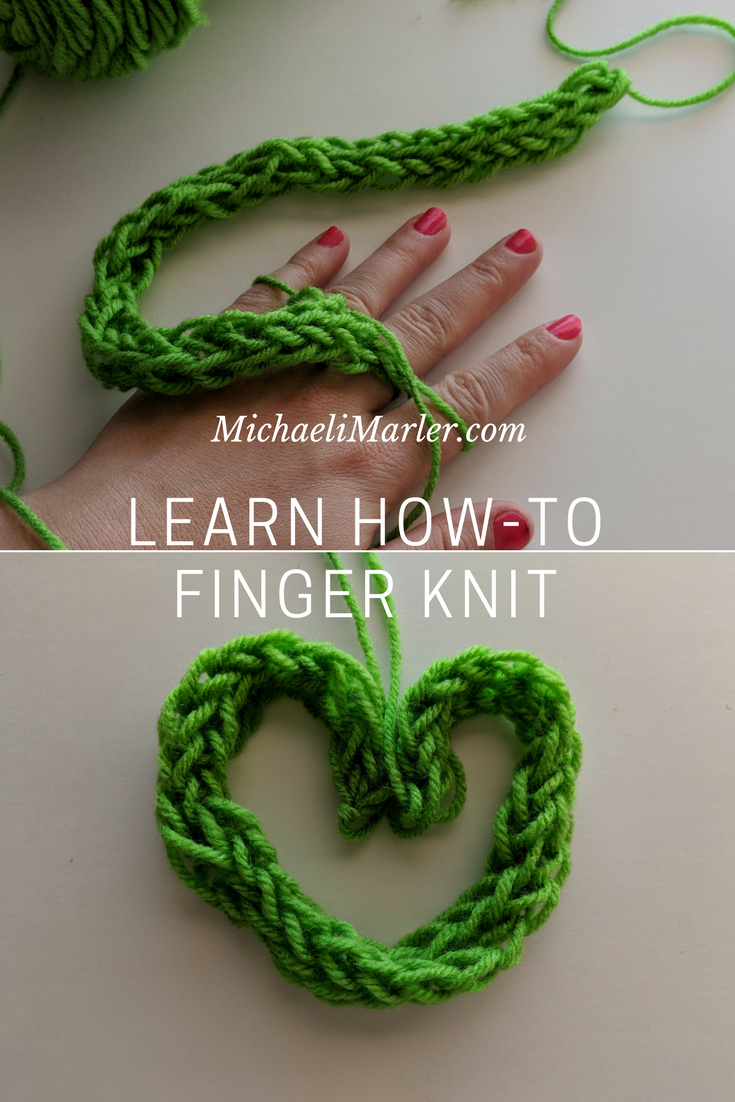
Don’t have a small circle loom to make a circular cord? Don’t worry! Learn how-to finger knit and achieve the same look using just your fingers! It’s so fun and simple, even kids will enjoy it!
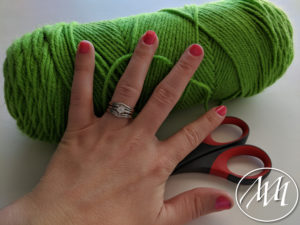
Materials:
- Yarn color/texture of choice
- Fingers
- Scissors
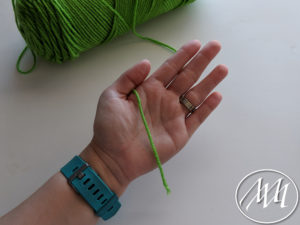
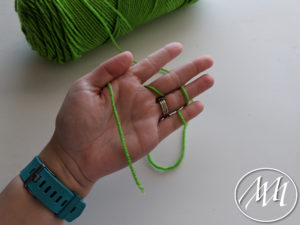
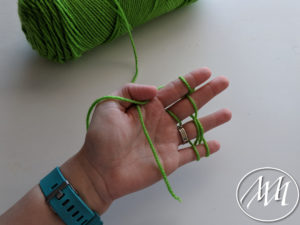
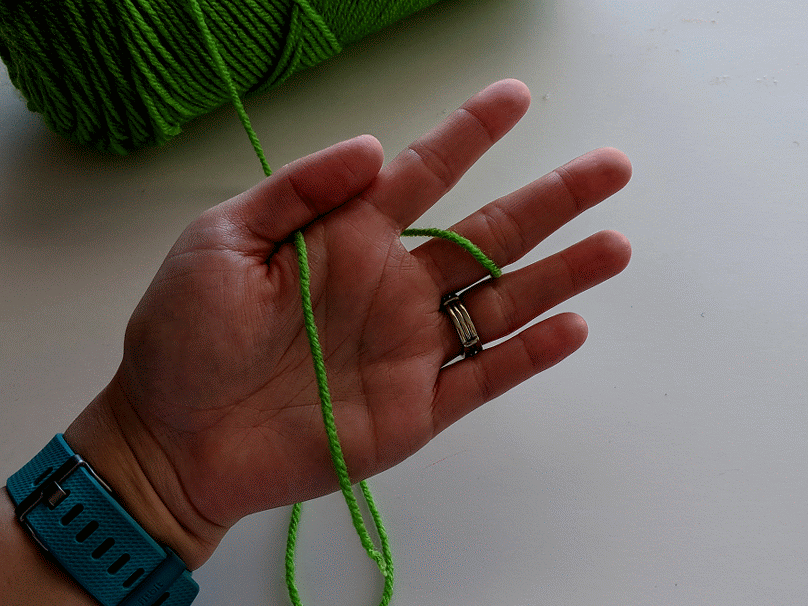
Step 1:
Hold the tail of the yarn between your thumb and index finger.
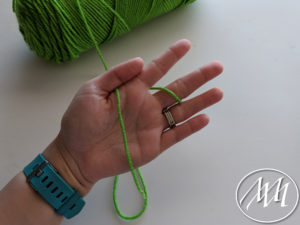
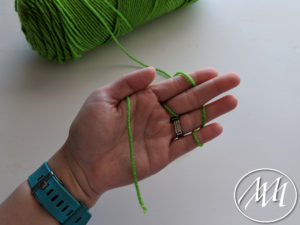
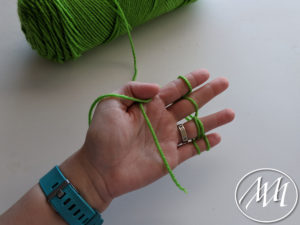
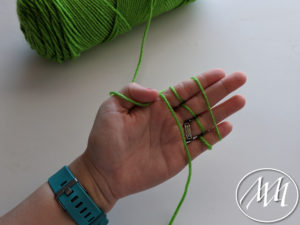
Step 2:
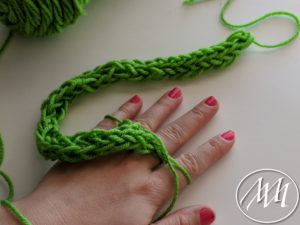
Weave the yarn behind your index finger, in front of your middle finger, behind your ring finger and in front of your pinkie.
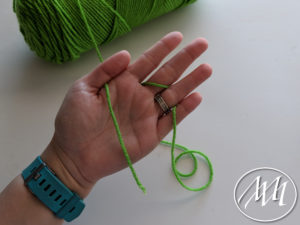
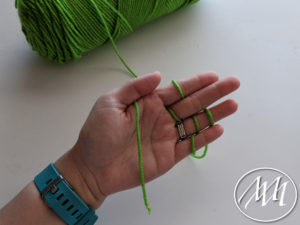
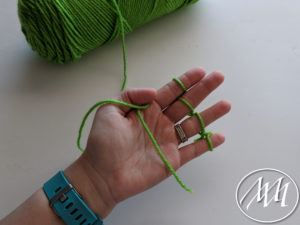
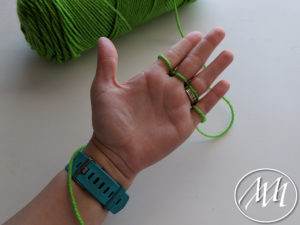
Step 3:
Continue to weave the yarn behind your pinkie, in front of your ring finger, behind your middle finger, and in front of your index finger. Repeat this steps 1-3 until you have two rows of yarn on each finger.
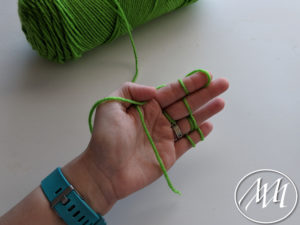
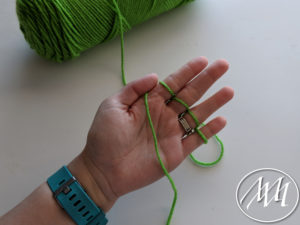
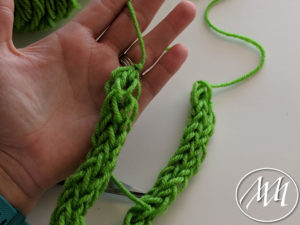
Step 4:
Move the bottom loop of yarn over the top loof of yarn on all four fingers. Push the existing yarn down to the bottom part of your fingers. Pull working yarn and cord work tight.

Step 5:
*Pull the yarn straight across all four of your fingers.
*Pull the bottom loop of yarn over the top loop of yarn on all four fingers.
Move the existing yarn down further on your fingers and pull the working yarn and cord work to keep it tight.
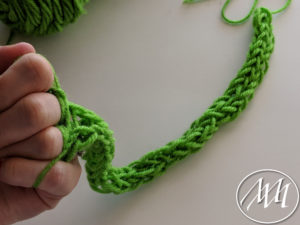
Step 6:
Repeat step 5 until you reach your desired length of cord.
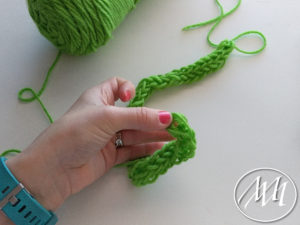
Step 7: Finishing
Gently pull the four yarn loops wrapped around your fingers off, but hold them together. Cut about 2 inches of the working yarn off. Insert the working yarn into the hole of the four loops and tie a knot.
Great tutorial! Something that I believe I can do myself, thank you, I will try it out soon!
I have been looking for a finger knitting tutorial for years! Many years ago when our family lived in Charleston, SC I had a 9 year old neighbor show me how but I had forgotten. This is the exact tutorial I’ve been looking for and precisely as Jason demonstrated! Thank You Michaeli!
what if you fingerknit a long line of “braid” then used that to fingerknit something.
I think that’s a great idea!